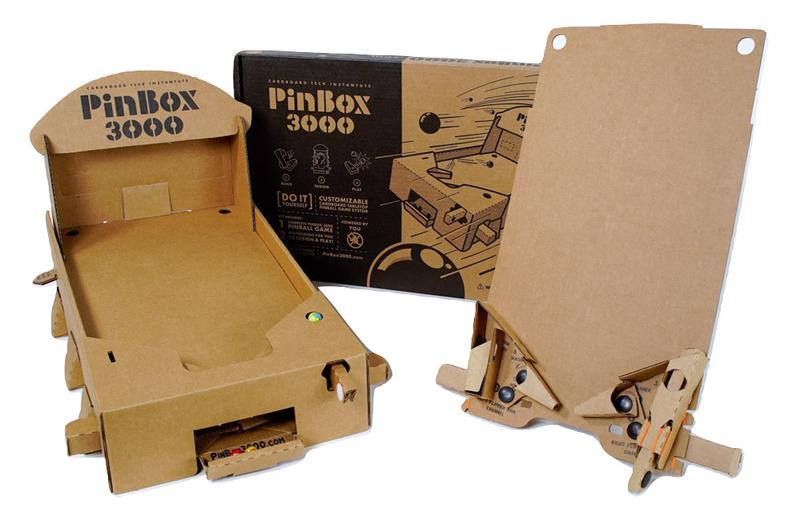
While at a Science conference, I discovered the most amazing hands-on, engaging, and fun project ever: Pinbox3000. Pinbox3000 is a company that manufactures tabletop pinball machines for students to build and design. After going home and visiting their website to see how many resources are available to help students with their designs, I knew I had to find a way to integrate them into my curriculum.
After my fifth graders completed Phase 1: Fundaments of 3D Printing and Phase 2: 3D Printed Board Games, I wanted to find a way to build upon what they already knew and continue to challenge them in new ways. The Pinbox3000 pinball machines were exactly what I needed. I purchased 10 pinball machines and began creating my unit.
STEP 1: Field Trip
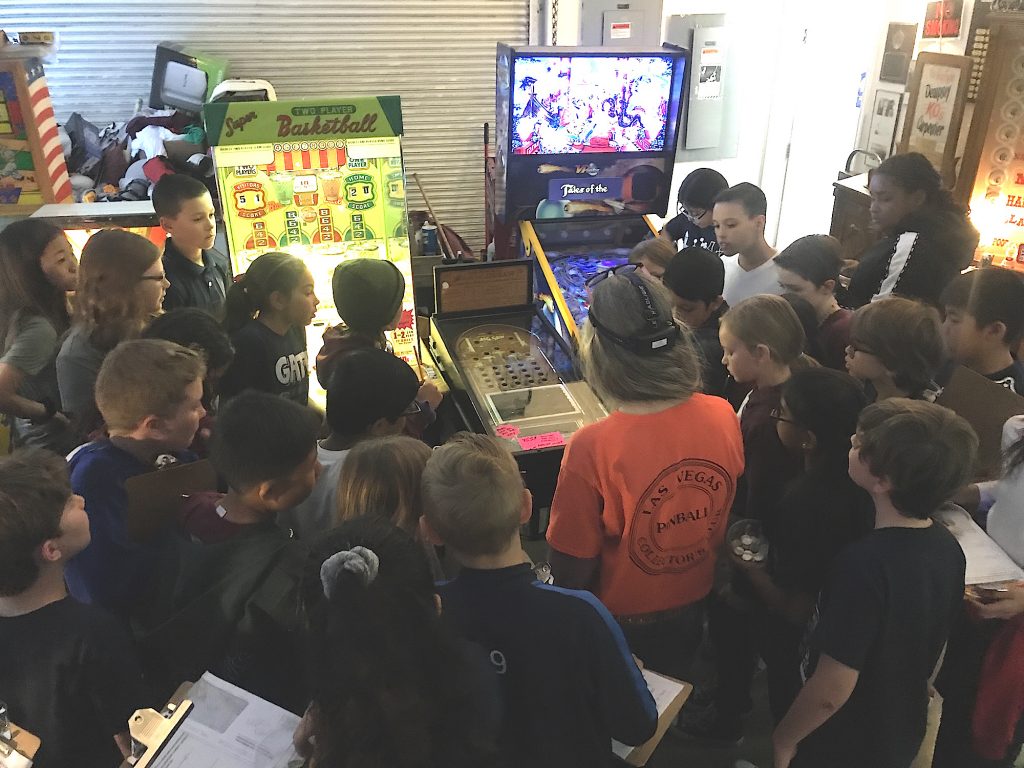
My school is located in Las Vegas which means there are some pretty cool places to take field trips. I wanted my kiddos to experience playing real pinball machines themselves in order to build up a lot of excitement for our new unit, so we took a field trip to the Pinball Hall of Fame. The Pinball Hall of Fame is an amazing museum where visits can play hundreds of games ranging from the early 1900s to now. My students were tasked with identifying different themes/stories, observing and recording the obstacles inside the games, as well as listing what aesthetics were appealing to them. Of course, kiddos had time to play some of the games and we got a behind the scenes tour and history lesson from the manager!
STEP 2: Planning
A lot of time went into the planning of pinball games. This stage is so important even though kids want to fast forward straight to building their machines. Allocating plenty of time for them to brainstorm and develop their games will make the later stages so much easier.
I set the stage by clearly defining the expectations of their pinball machines:
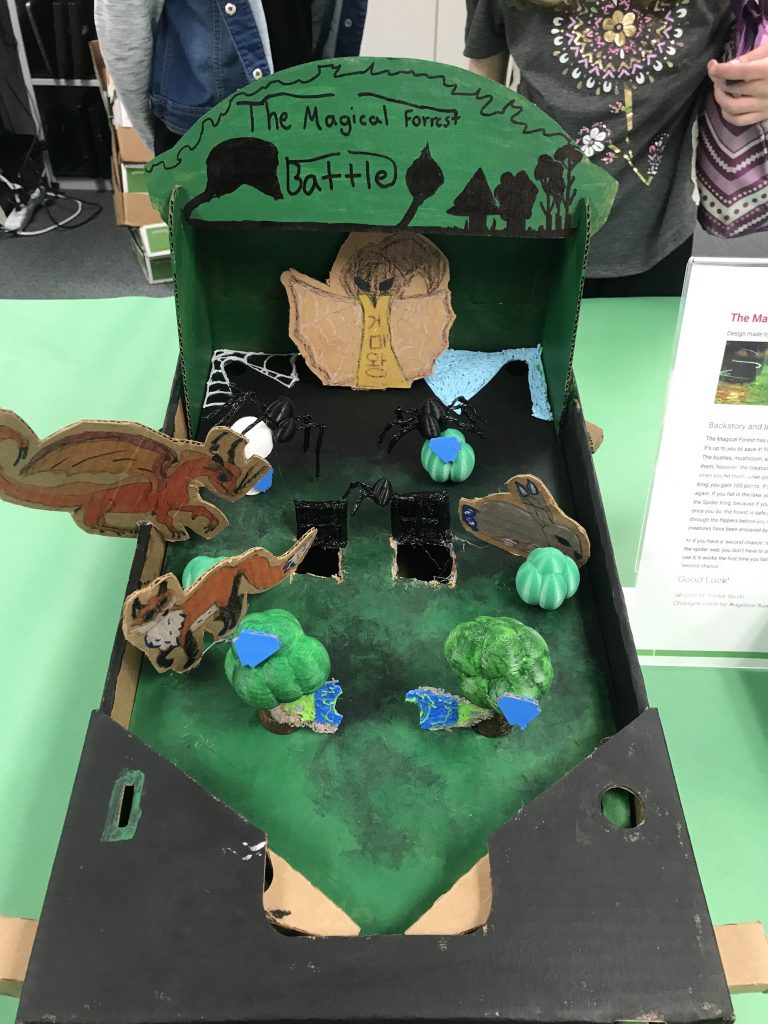
- A clear and creative theme with 5 essential elements
- 70% of all obstacles must be created using a 3D printer
- At least one mechanical device that involves motion, weights, or complex angles should be devised and designed as part of the project (ball lock, a trap door, a special ramp, a hopper full of marbles, or some fantastic contraption.
- Tells a story and has sequential objectives to win.
- Additional obstacles using other materials
To begin, students were put into teams of two and asked to choose an overarching theme and develop a story that included five essential elements using their Pinball Machine Planning Guide.
Here are some of the themes groups chose:
- Pokémon
- Winter Wonderland
- Jail Break
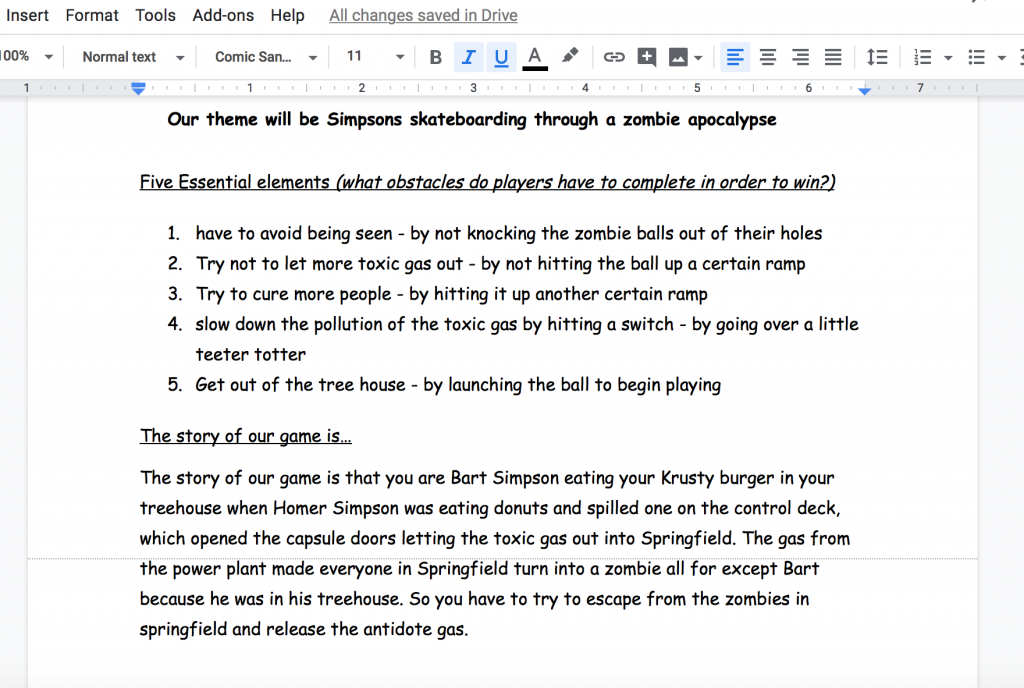
- The Simpsons
- The Three Little Pigs
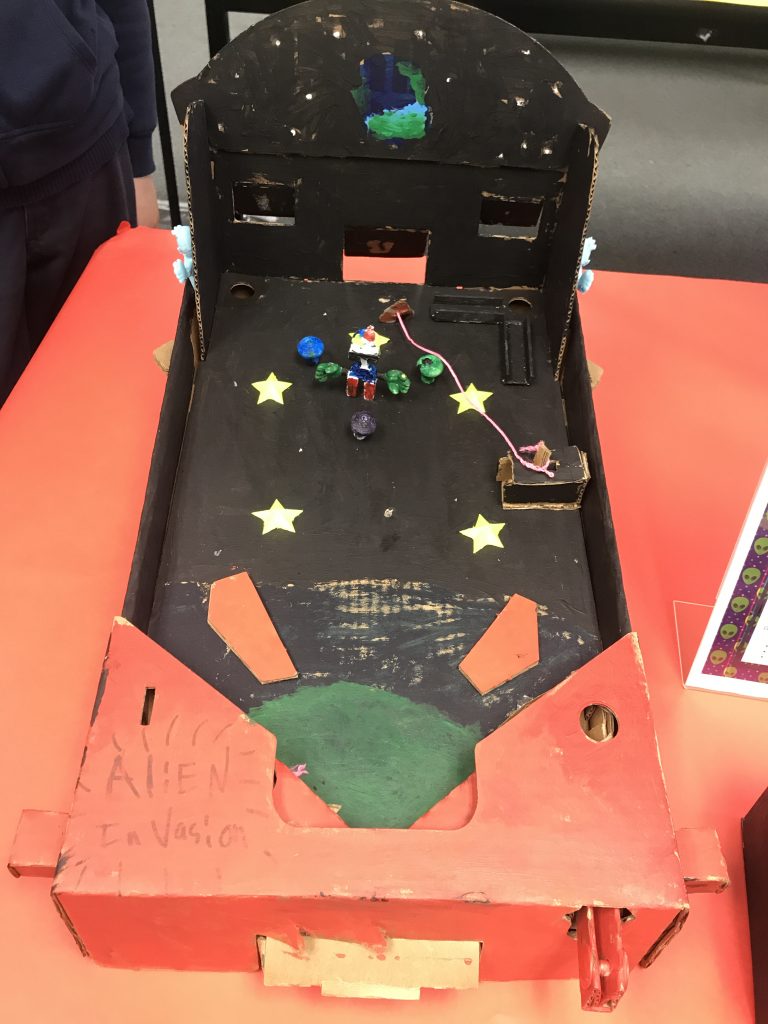
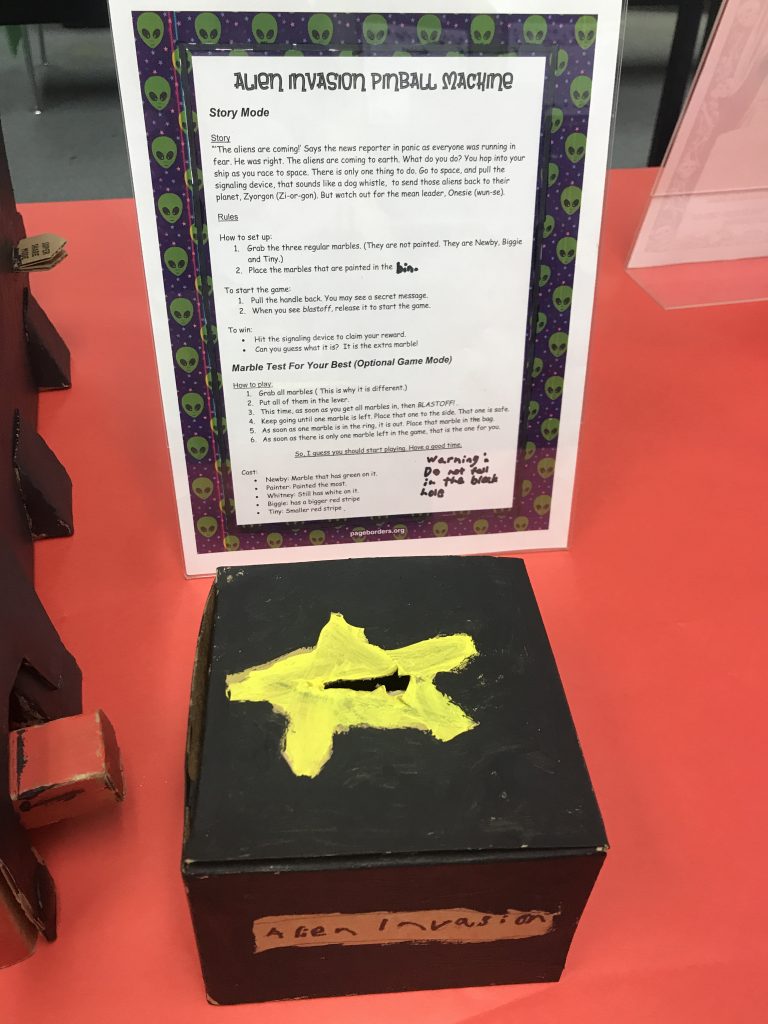
- Alien Invasion
Some essential elements included:
- Slow down the pollution of the toxic gas by hitting a switch – moving over the teeter totter
- Launch yourself into space – Pull the trigger and let go to launch marble
- Bake a cookie and place it on a plate without getting caught by Santa or his elves – drop the ball into a hole
- Get the key from the guard – knock the ball into the opening at the bottom of the box
At this point, teams decided which elements would be 3D printed and which would be created using other materials. Finally, groups created drafts of their pinball machine game boards and presented them to me for approval. This was an amazing opportunity to provide valuable feedback and ask probing questions about design elements so students could brainstorm solutions and make modifications to their design prior to the building stage.
STEP 3: Designing Game
Once the drafts were approved, groups could begin working on developing the 3D printed obstacles for their games. This allowed kiddos who were ready to move ahead the opportunity to push forward while I worked with teams who needed additional guidance.
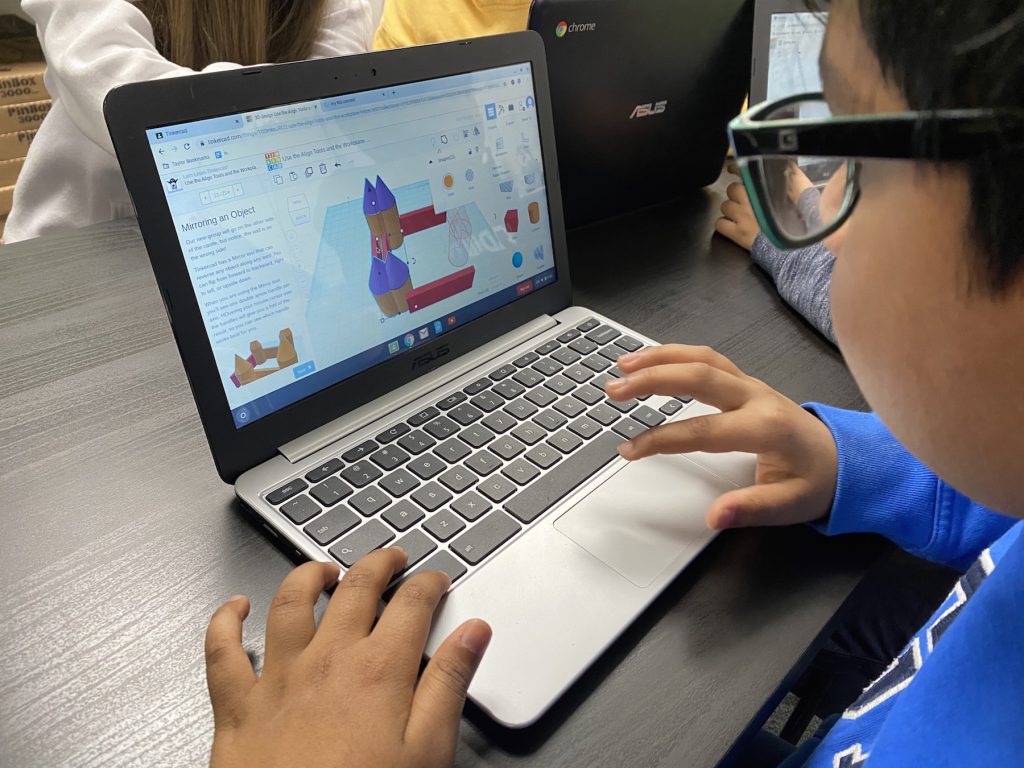
Since my kiddos were familiar with Tinkercad, I continued to use this platform for designing their 3D printed obstacles. I created a new class and then shared the class code through Google Classroom. Even students who were new and had never had experience working on Tinkercad before, were able to quickly and easily create their own accounts.
I provided students with a series of modules to complete as a refresher since it has been almost a year since they had used the program. For kiddos who were new, this was a great opportunity to become familiar with the platform and practice creating their own 3D objects.
Once all groups had their drafts approved, it was time for groups to begin building their pinball machines. Pinbox 3000 provides an amazing video tutorial with step by step directions. Students were given their own pinball machine boxes and had to follow the tutorial as they built their machines.
Having done this the previous year, I highly recommended that students watch 3-4 minutes of the video then go back and watch it again as they built. This way they could see ahead to prevent any mistakes.
It took about an 1 ½ hours for groups to finish building their machines. Have kiddos keep all of their scraps inside their boxes because they may decide to use those pieces later.

At this point, groups continued to design and print their 3D printed obstacles as well as their non-3D printed obstacles.
STEP 4: Putting It All Together
Once their obstacles were all created, it was time to decorate and put their games together. This was a really exciting time in class.
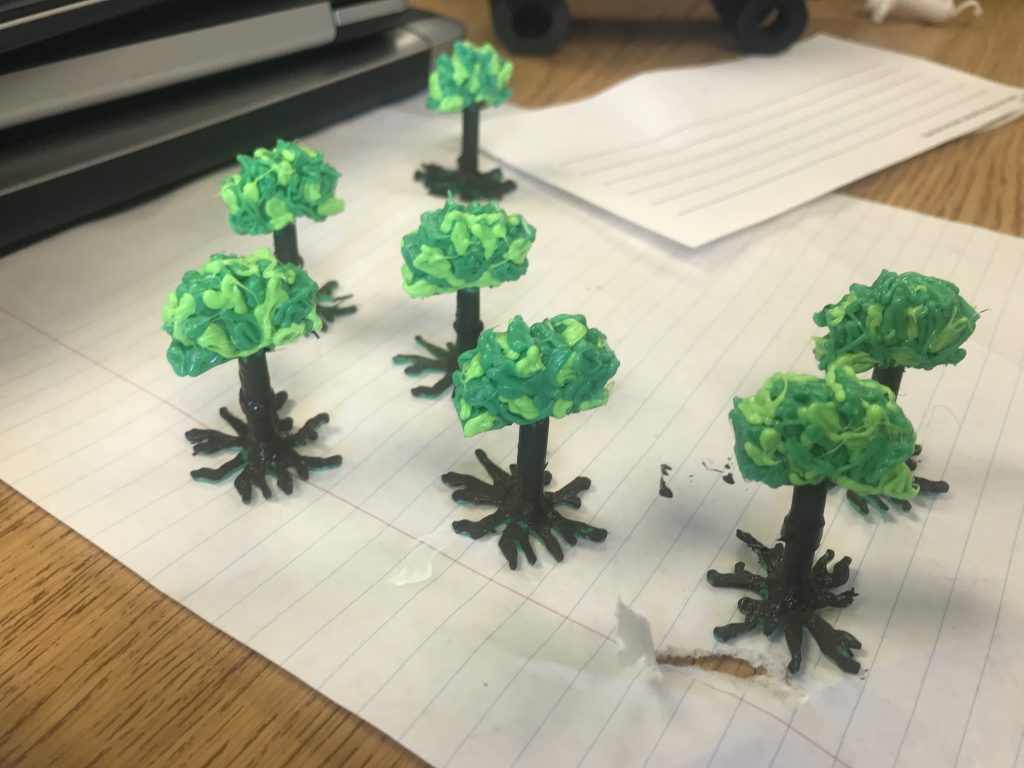
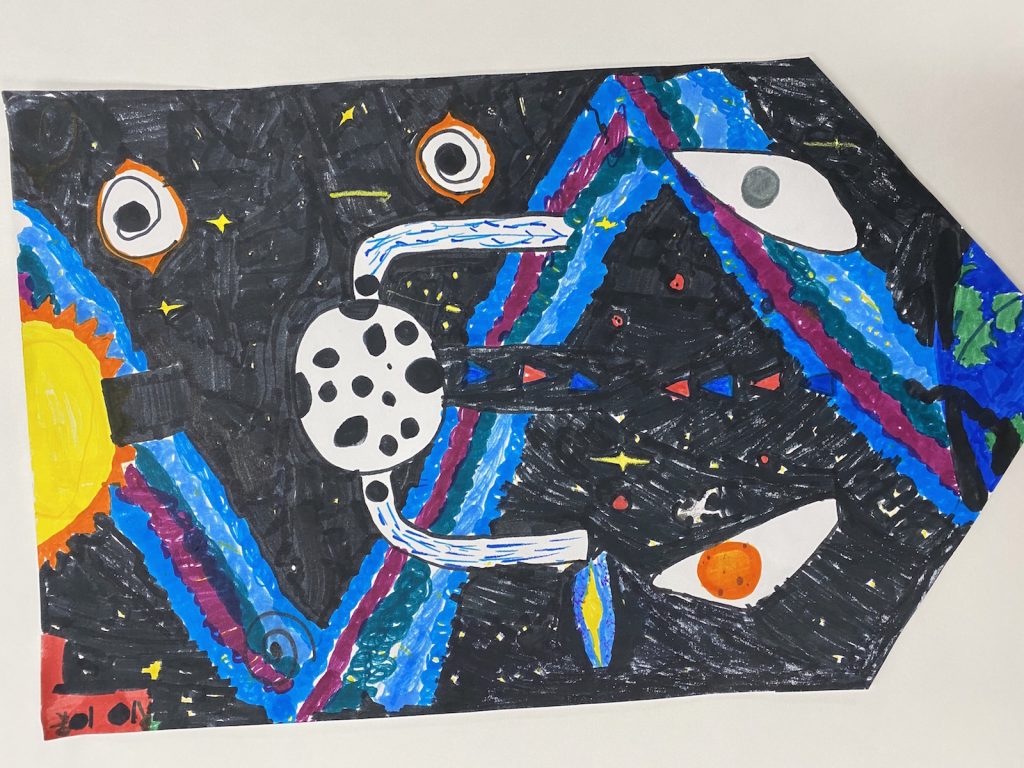
Kiddos loved using 3D pens to decorate the obstacles they created as well as paint their tabletops. The creativity, imagination, and ingenuity of my kiddos was absolutely astounding. I was awestruck by some of their creations.
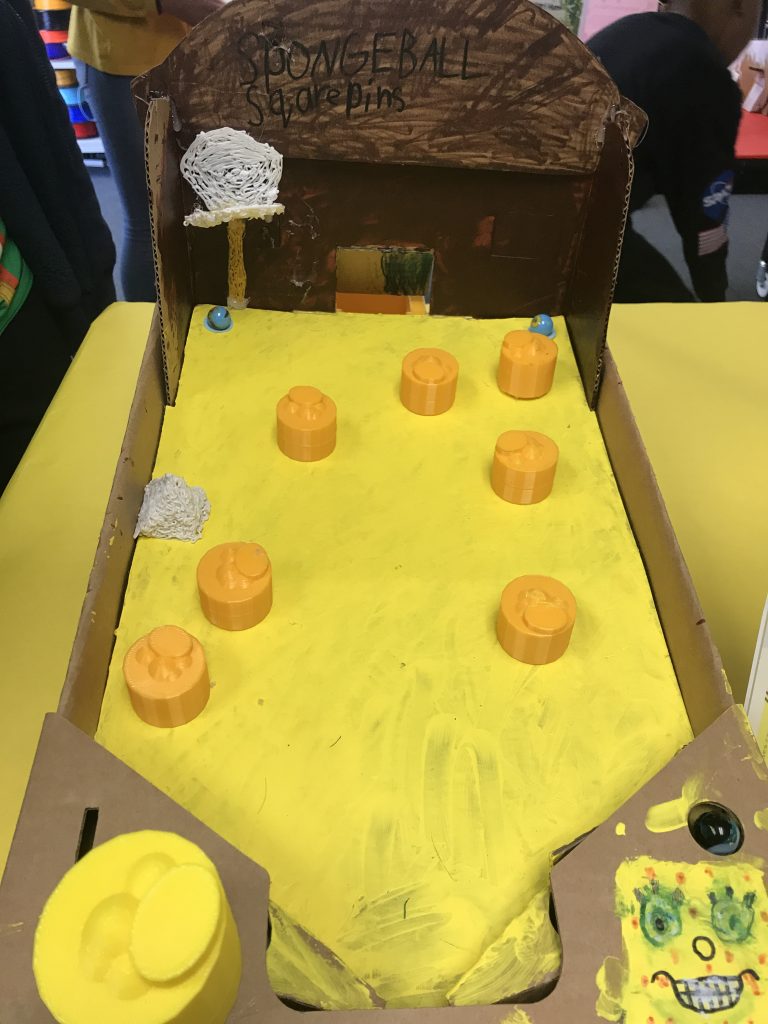
Take a look at some of their final products:
STEP 5: Finishing Touches
When the pinball machines were done, students had to type the story and rules to their pinball machines. We put these in their own display stands so they were easy to read.
Teams also had to design and decorate their own voting boxes based on the theme of the pinball machines.
STEP 6: Pinball Night
Each year my school hosts an annual science/engineering night for families and students. This was the perfect event for my kiddos to showcase their 3D printed pinball machines. As visitors arrived to my classroom, they were given three tickets to vote for their top three favorite pinball machines. Guests played their tickets inside the voting boxes located next to the pinball machines and played to their hearts content!
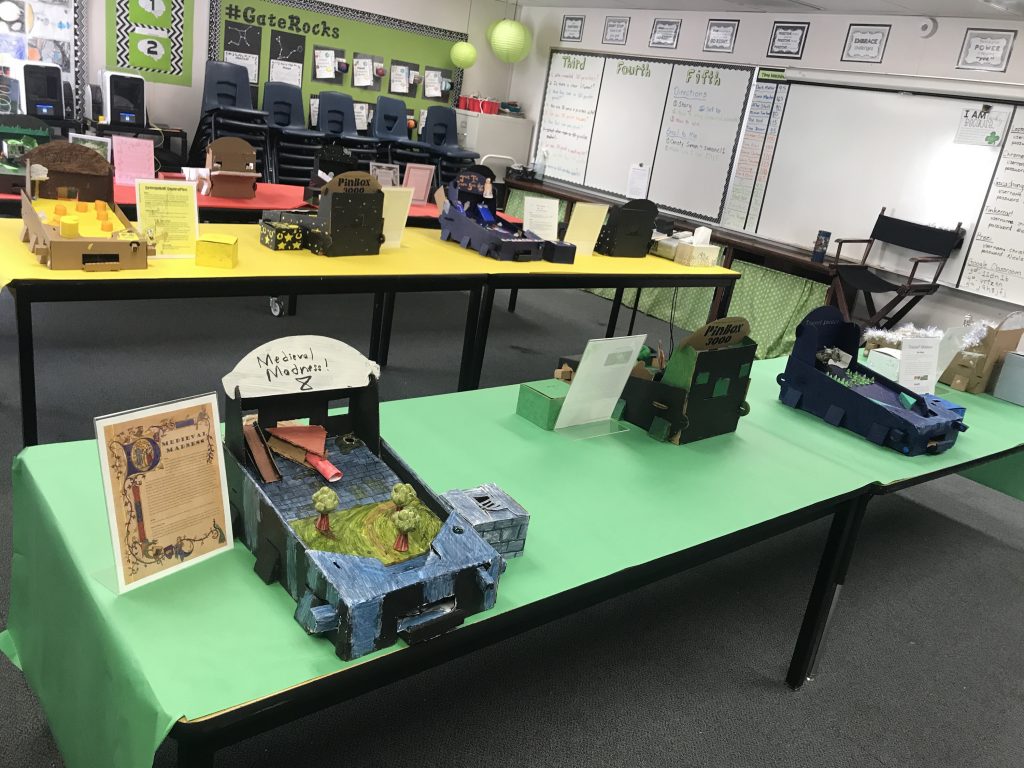
My room had a line out the door as families and friends waited to have their chance to play these tabletop pinball machines!
The next day groups counted their tickets and had their own party where they got to play and enjoy all of the pinball machines! Finally at the end of class, the winners were announced. It was such a special day!
Final Thoughts
I know this unit may not work for every classroom but you can definitely adapt it to meet the needs of your class.
Maybe you don’t have a 3D printer….no problem! Build the pinball machines without them and use cardboard and other materials for the obstacles.
Maybe time is a huge factor and you cannot commit hours each week to building pinball machines. Maybe you could integrate this project into your language and science curriculum. This unit is definitely cross-curricular and can be completed in small segments over a long period of time.
Another possibility is to purchase one of the predesigned games available on Pinbox3000. Students would still get the experience of building their own pinball machines but wouldn’t have to spend time developing their own stories.
I hope you find this project as exciting and beneficial for your students as I did for mine. This was the perfect culminating activity that not only challenging my students but also gave them the