Geocaching in the Classroom

Kids all over the nation went wild for Pokémon Go when it was released. Finding and catching new species of Pokémon was like a thrilling treasure hunt. This was no different than at my school in Las Vegas. I loved that kids who might not otherwise get off their tablets or computers were active and engaging with the world.

This was the perfect opportunity for me to introduce geocaching to my students. Geocaching is a challenging, fun, and engaging activity that millions of people do around the world. Just like Pokémon, it is a treasure hunt but at a higher level because it involves using clues and GPS.

MATERIALS

GPS Navigators – Since most students are not allowed to have cell phones at school, you will need to purchase GPS navigators. Two kiddos per navigator.

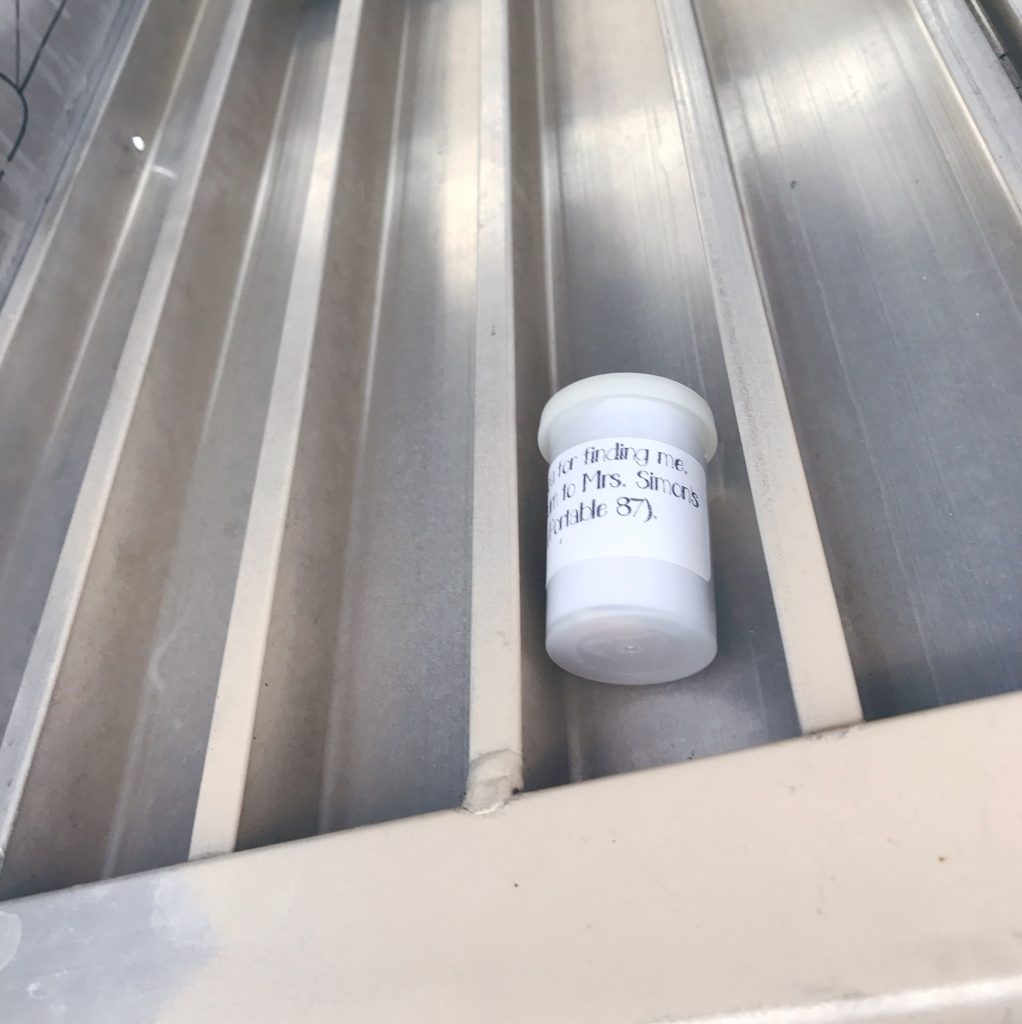
Film Canisters – You will want to invest in small film canisters or other small containers that can be used as caches because they are small and easy to hide.

Address Labels – I place on each cache a label that reads “Please return to Mrs. Simon in portable 87. Thank you!” This will greatly increase the odds of your cache being returned if someone in another class discovers its location.

STEP #1 – PREPARATION

Preparing Caches

Prepare your canisters by placing address labels on the outside with information about how to return it if found by a student not in your class.  Next, make log sheets that will be placed inside the cache for students to write their monikers proving that they found the cache.  You will then assign a number to each cache based on how many caches you are planning on using.  Finally, choose and cut out small image that will fit on the bottom of the cache.  I use cartoon characters because most kids will know who they are.  The pictures are used because kids have to record on their log sheet what character was on the bottom of the cache.  This is another way for me to ensure that students stay honest and actually locate the caches on the log.

Hiding Places

Finding hiding places for your caches where the other 500+ students at your school won’t see them is a challenge.  I brought a canister with me as I tested out possible hiding places. For each location I found, I logged its absolute location (latitude and longitude coordinates), placed a piece of Velcro to help keep the cache in place, jotted down a description of its location, and wrote a clever clue to help students find the cache when they got there.  I record all of this information in a Cache Location Roster for me to use

Here is a list of good hiding places that you may find around your school…

  • Under a slide
  • The bottom of a water fountain
  • Under the steps to the playground
  • On top of a tree branch that is reachable by students
  • Buried in the corner of a flower bed or school garden
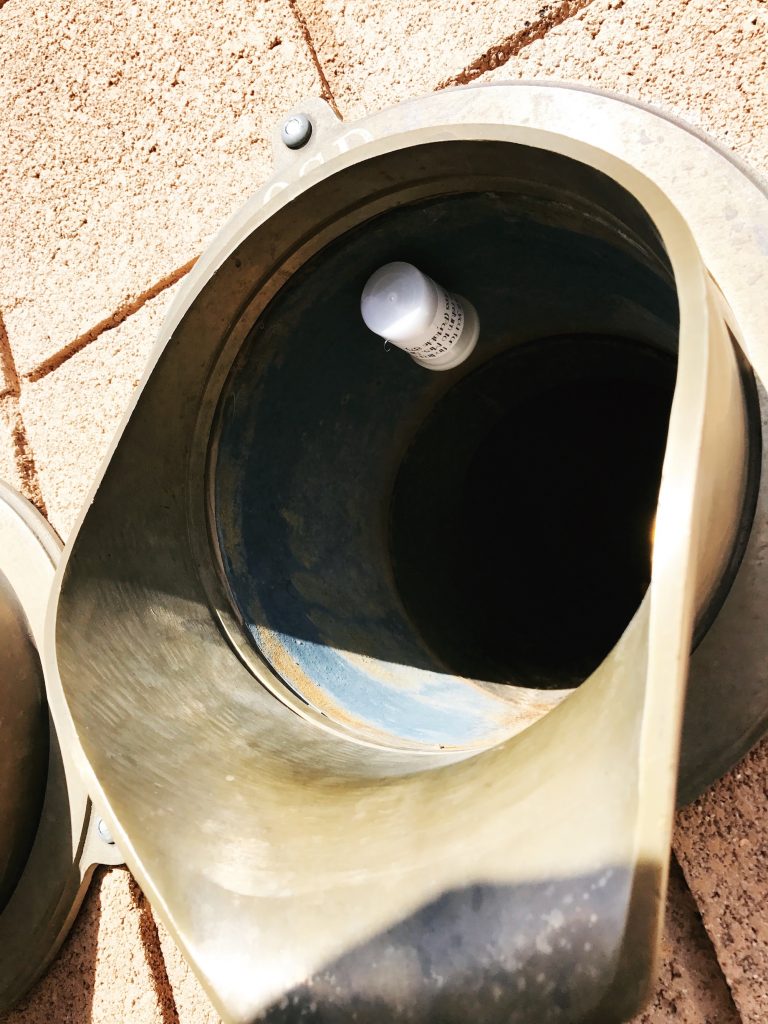
  • Inside of a waterspout
  • Velcro to the bottom of a fire hydrant

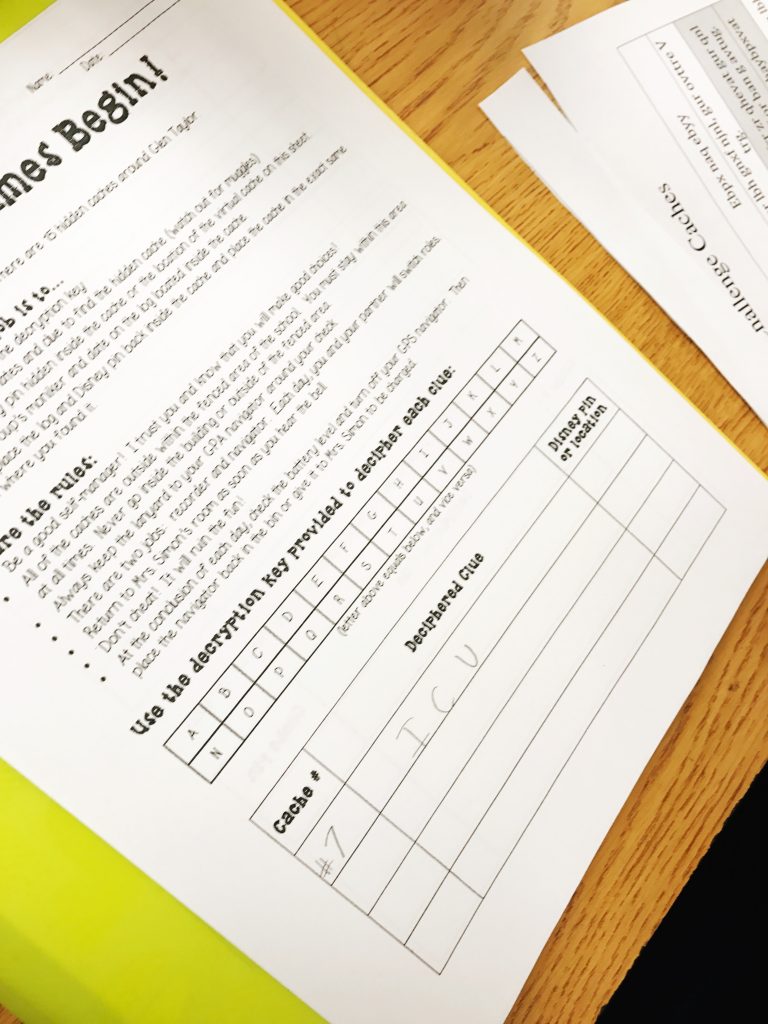
To add an extra challenge, I encrypt the messages and students have to decipher them using an encryption key.

Here is an example….

Visual Caches

Not only do I use physical caches like canisters, I also use visual caches. These are objects around school that students have to identify and where there is no physical canister to discover. For example I always like to use our school’s American flag. The clue that is given is 50 plus 13. This is to represent to 50 stars and 13 stripes. 

Here are some other good visual caches…

  • Loud speaker
  • Lock on a gate
  • Video cameras
  • Basketball hoop
  • Streetlights
  • Bike racks
  • Center of four square court
  • Pitchers mound on baseball field

Cache Cards

Make cache cards that contain the cache number, clue, and coordinates for students to cut out and place in an envelope.  Students will randomly draw cards to discover. This helps prevent everyone in your class from looking for the same cache at the same time.

I let students know which caches are visual caches by highlighting those rows with a different color.  This is important so that students aren’t looking for a canister when there isn’t one to find.

Cache Log

You will need to create a log for students to record which caches they found and the image that was inside the cache or location for the visual cache.  If you decided to encrypt the clue, then students can also record the deciphered clue here too.

STEP #2 – PREPARING STUDENTS

Geocaching is a great opportunity to teach students about geography.   I spend two weeks reviewing mapping skills such as latitude and longitude, parts of a map, and innovations in navigation.

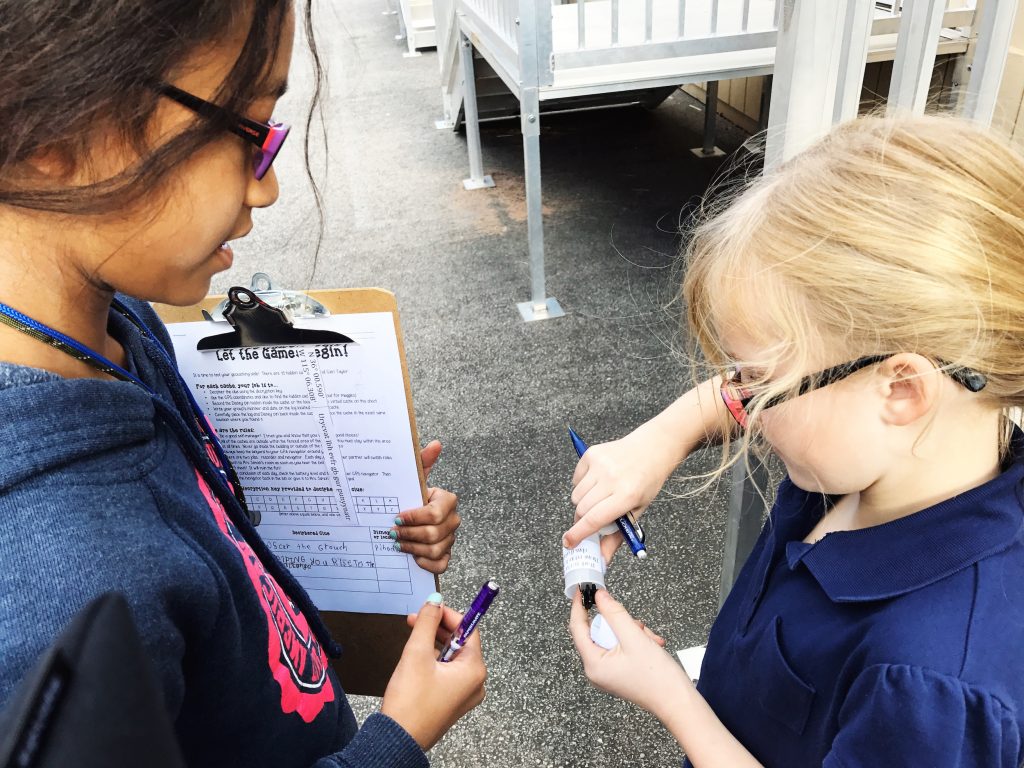
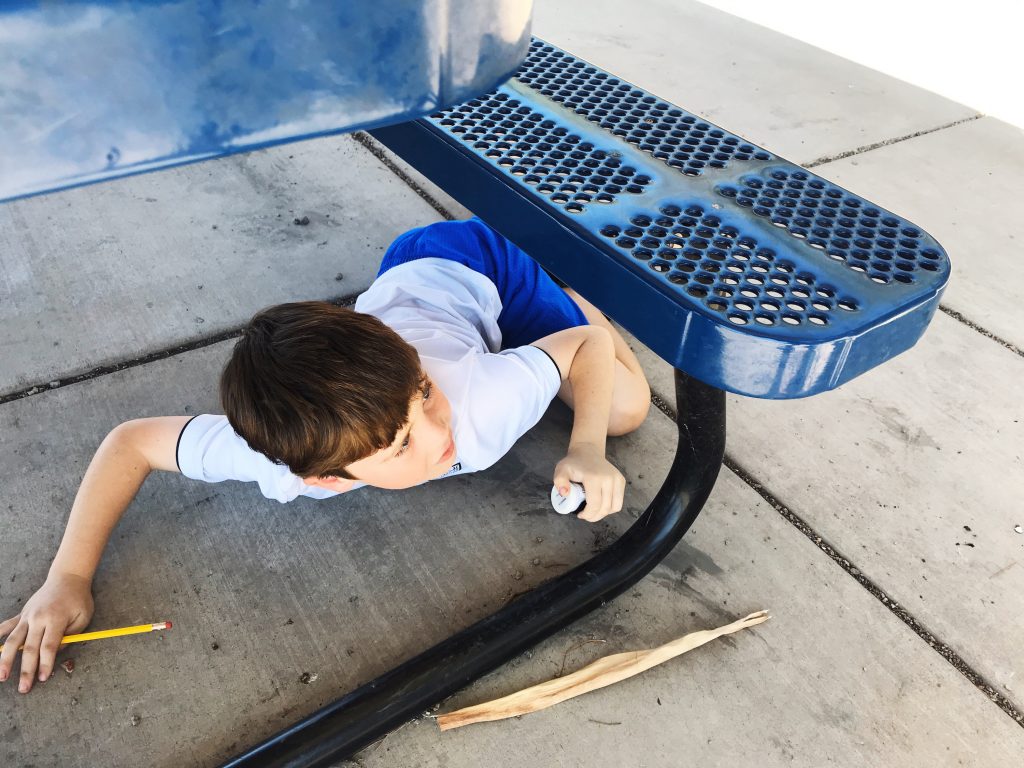
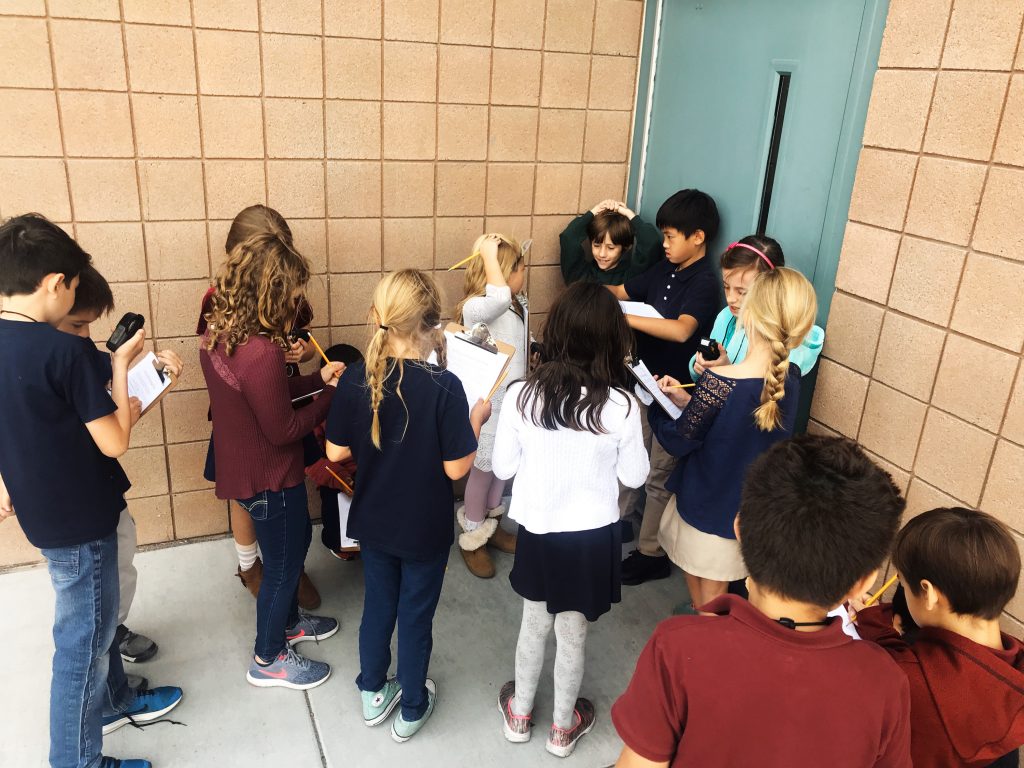
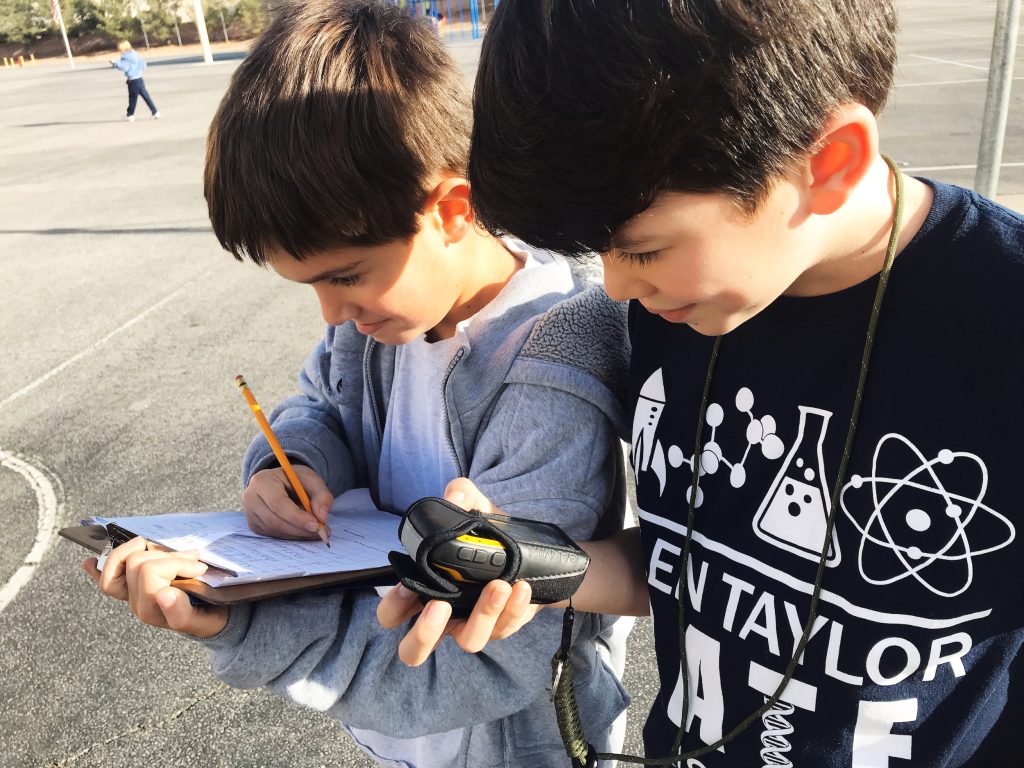
Students also practice using their GPS navigators and finding caches by participating in a teacher-led scavenger hunt. I divide students into their geocaching teams and students take turns being the navigator (kiddo who uses the navigator) and the recorder (the student with the clipboard who records their findings on the log sheet).

Once it is time for students to begin geocaching, I go over the rules and expectations of geocaching.  Kids will be trusted to walk around your school’s campus without you right next to them, so this is an extremely important step.  You will of course be outside walking around and monitoring students but there is definitely a certain amount of freedom and trust involved!

Here are the rules I review with students:

  • Be a good self-manager! I trust you and know that you will make good choices!
  • All of the caches are outside within the fenced area of the school. You must stay within this area at all times. Never go inside the building or outside of the fenced area.
  • Always keep the lanyard to your GPA navigator around your check.
  • NEVER RUN!
  • There are two jobs: recorder and navigator.  Each day, you and your partner will switch roles.
  • Return to Mrs. Simon’s room as soon as you hear the whistle.
  • Don’t cheat! It will ruin the fun! 
  • Watch out for Muggles (non-geocaching folk). You are not allowed to get a cache while students not in our class are in the area. 
  • At the conclusion of each day, check the battery level and turn off your GPS navigator. Then place the navigator back in the bin or give it to Mrs. Simon to be charged.

I also carefully review what to do when teams find a cache…

  • Decipher the clue using the decryption key
  • Use the GPS coordinates and clue to find the hidden cache (watch out for muggles)
  • Record the Disney pin hidden inside the cache or the location of the virtual cache on this sheet.
  • Write your group’s moniker and date on the log located inside the cache.
  • Carefully place the log and cartoon character back inside the cache and place the cache in the exact same location where you found it.

STEP #3:  TIME TO GEOCACHE

This is the moment of truth.  Each team is given their cache cards, clipboards, envelope, GPS navigator, and cache log.  Before students can go outside they must cut out all of their cache cards, put them in the envelopes, and decipher the clue of one of their caches. 

Once they do all of that, it is time to go outside.  I go outside with a blow horn so that I can call students back when time is up each day.  Have students bring their envelopes outside with you so that they can draw new cache cards as needed.

The first day is always the hardest for kids but it does get easier.  If a group hasn’t found a cache by the second day, I will walk around with them and offer guidance and help as needed.  Once groups find their first cache, they are all set to go and it becomes so much easier.

My classes are only 35 minutes so this stage take about two weeks.  For students who finish early, I create five challenge caches and don’t hide them until a group is on their last two or three regular caches. If a group finishes all of the challenge caches, I then ask them to help me find new cache and write clever clues to go with them.  This is always great because you will find that some cache locations just don’t work.  Maybe they get knocked down a lot and go missing, or maybe it is just too challenging or easy.  Whatever the reason is, having backup locations is always great!

STEP #4:  WRAPPING IT UP

At the end of the unit, I walk around with students outside and we collect all of the caches.  Kiddos share the cartoon characters and deciphered clue for each cache and mark whether or not they were correct on their cache logs.  This is always so much fun because groups want to see if they were right and which team found the most caches. 

Once we are back in class, students reflect on which caches are keepers and which caches should be replaced.  I like to have a special treat available for students to celebrate the end of our geocaching adventure.

FINAL THOUGHTS

I am super lucky and get to teach my kiddos for three years, so we get to do a lot of really cool things together.  My fifth graders always tell me before going on to middle school that one of their favorite activities in GATE was geocaching.  It is such a rewarding and memorable experience that is definitely work all of the effort and time to set it up!

Cooperative Board Games:  Good for the Classroom and Home

Cooperative board games are different in that they don’t have one winner who gained his or her victory by dominating the other players, but rather all the players win or lose together.  Everyone is on the same team trying to solve the problem presented by the game.  Cooperative board games are amazing because they create a shared experience and story that all the players have a part in creating.

Benefits

The benefits to playing cooperative board games are numerous.  Children who play these types of games must learn how to communicate with the other players at the table:  ie. what they are planning, where they are strong, and where they need help.  Players will flex their cognitive muscles as they practice persuasive strategies to convince players to share resources or lend, make decisions, and take risks in a safe environment. 

Cooperative games also lend themselves perfectly to review games in the classroom.  Kiddos work in teams to answer test-prep questions and are extremely willing to help each other out because they are all working towards the same goal.  Even the most reluctant learners want to do well because they want to take their turn and win the game! 

Another powerful benefit is that children develop their socio-emotional skills.  In a cooperative game, working together is obviously a must.  Players cannot always put their desires and wishes first because they have to do what is best for the team.  Often players may not get to be the hero that finishes off the challenge, but they know they played an important role in setting up the victory.  Most importantly, kids (and let’s face it, adults too) learn the importance of encouraging others.  Finally, cooperative games provide a great opportunity for children, some of whom may not be inclined to join a team sport, to practice teamwork.  

Favorite Cooperative Games

The games I have complied here are by no means an extensive list of cooperative games. This is a huge genre with thousands of games, but these are my favorite games to play with my family and students.

Honorable Mention:  Pandemic

Pandemic is a great gate way game into the hobby and has a fantastic theme.  You are scientists and medical professionals saving the world from an outbreak of several diseases, a pandemic if you will. Rules are simple and easy to explain, and most importantly the game is fun.  However, it doesn’t have the same reliability of many of the other games on the list and isn’t as likely to be a go-to game that gets to the table over and over again.  

Honorable Mention:  Pen and Paper RPG’s like DnD and Starfinder

This might be the most cooperative game on my list.  Players work together as a party to go on a grand adventure, and as a result, they learn the importance of working together to solve any number of problems. Children have a truly limitless decision space to practice those rational thinking skills we love them to hone.  Each player helps craft the story and have opportunities to feel like an epic hero. The reason it doesn’t make the list is that it can be hard to keep a game going as it can require quite a time commitment.  DnD also requires one person who is willing to be the game master and take on the role of storyteller. It can be hard to find someone who feels comfortable taking on this role. However, I can honestly say that I love incorporating role-playing elements into my classroom to great effect.  The most excited and “into” it you are, the more your students will buy into the story and whatever you are teaching.

Ok, now for my top 5 Best Cooperative Board Games!

Number 5:  Mice and Mystics  

This is a fantastic game where a party of mice adventurers embark on an epic quest to save the king and kingdom from a terrible threat.  One great benefit to playing this game with children is the opportunity to demonstrate storytelling elements as you progress through the campaign. This game also provides many of the benefits mentioned above when it comes to RGPs without the drawback of needing a GM.  Mice and Mystics is a family favorite, but when the story ends, there isn’t much replayability. 

Number 4:  Castle Panic

Hardcore gamers might cringe at this pick, but it is a fantastic game for our younger gamers.  The rules are simple:  players need to defend the castle from what seems like an endless stream of orcs pouring from the woods.  With archers, knights, and swordsmen, players defend the castle walls on their turn.  If the walls get broken down by the enemy horde, they must be rebuilt with brick and mortar.  Don’t have the card you need?  Not a problem; players can trade cards with other players!  This game forces everyone to look many turns ahead and start making plans/trades to set up a good defense.  While this is not the hardest game on the list, it is fun and a great entryway game for kids and those new to the hobby.  

Number 3:  Burgle Bros

Who doesn’t love a good heist movie?  This game is a heist movie in a small box.  You work as a team to locate and crack safes, avoid the guards, and safely make it to the waiting chopper on the roof.  Each player chooses a character with unique abilities that they can use to make the heist a success.  Burgle Bros is campy fun while being difficult and even punishing.  It can also be hilarious as everything is falling apart and you scramble to save your bacon. I would have put this game higher on the list, but I realize this theme will not fly in every home. Still, I cannot recommend this game enough.  

Number 2:  Spirit Island

First, let me say this is the hardest game on the list and would not be a great place to start if you are just dipping your toes into this hobby.  If, however, you have played games like Pandemic to the point where you no longer feel much challenge, this game is likely perfect for you.  Spirit Island sees you taking the role of a unique spirit on an island while defending it from invaders.  Every player will have special skills that they can bring to the table and contribute to the defense of the island.  One aspect I love about this game, as a teacher, is the opportunity to use the premise to discuss perspective.  This game puts you in a position to view colonization from the perspective of the native people.  It allows players to talk about how perspective shapes our understanding of history, and how others might view the same events through a much different lens. This game is tense and you never feel like you are winning, right up until you do (if you do). 

Number 1:  Now Boarding

Now Boarding is hands down my favorite cooperative game.  I love this game and look for any opportunity to get it to the table.  In this game, the players are running small airlines that shuttle people all over the map.  Pick someone up in LA and drop them in Miami.  The catch which makes Now Boarding challenging is there is a timer.  You aren’t given all the information you need until that timer starts, at which point plans go out the window and you have to adapt on the fly (pun totally intended).  

My child struggled with timed tests in school.  He would panic and freeze when one was placed in front of him.  Games like these dramatically improved his confidence when it came to working under a clock.  He had opportunities to feel that pressure in a fun and non-threatening environment, and because of this, his confidence skyrocketed.  

Final Thoughts

I love cooperative games.  I love that my friends, students, and family get to be on the same side; they are playing with each other instead of against each other.  Most importantly, I love that at the end of what cooperative game we are playing either at home or at school, everyone had a shared experience that they can bond over.  

Pinball Machines + 3D Printing = Magic

While at a Science conference, I discovered the most amazing hands-on, engaging, and fun project ever: Pinbox3000. Pinbox3000 is a company that manufactures tabletop pinball machines for students to build and design. After going home and visiting their website to see how many resources are available to help students with their designs, I knew I had to find a way to integrate them into my curriculum.

After my fifth graders completed Phase 1: Fundaments of 3D Printing and Phase 2: 3D Printed Board Games, I wanted to find a way to build upon what they already knew and continue to challenge them in new ways. The Pinbox3000 pinball machines were exactly what I needed. I purchased 10 pinball machines and began creating my unit.

STEP 1: Field Trip

My school is located in Las Vegas which means there are some pretty cool places to take field trips. I wanted my kiddos to experience playing real pinball machines themselves in order to build up a lot of excitement for our new unit, so we took a field trip to the Pinball Hall of Fame. The Pinball Hall of Fame is an amazing museum where visits can play hundreds of games ranging from the early 1900s to now. My students were tasked with identifying different themes/stories, observing and recording the obstacles inside the games, as well as listing what aesthetics were appealing to them. Of course, kiddos had time to play some of the games and we got a behind the scenes tour and history lesson from the manager!

STEP 2: Planning

A lot of time went into the planning of pinball games. This stage is so important even though kids want to fast forward straight to building their machines. Allocating plenty of time for them to brainstorm and develop their games will make the later stages so much easier.

I set the stage by clearly defining the expectations of their pinball machines:

  • A clear and creative theme with 5 essential elements 
  • 70% of all obstacles must be created using a 3D printer 
  • At least one mechanical device that involves motion, weights, or complex angles should be devised and designed as part of the project (ball lock, a trap door, a special ramp, a hopper full of marbles, or some fantastic contraption.
  • Tells a story and has sequential objectives to win.  
  • Additional obstacles using other materials

To begin, students were put into teams of two and asked to choose an overarching theme and develop a story that included five essential elements using their Pinball Machine Planning Guide.

Here are some of the themes groups chose:

  • Pokémon
  • Winter Wonderland
  • Jail Break
  • The Simpsons
  • The Three Little Pigs
  • Alien Invasion

Some essential elements included:

  • Slow down the pollution of the toxic gas by hitting a switch – moving over the teeter totter
  • Launch yourself into space – Pull the trigger and let go to launch marble
  • Bake a cookie and place it on a plate without getting caught by Santa or his elves – drop the ball into a hole
  • Get the key from the guard – knock the ball into the opening at the bottom of the box

At this point, teams decided which elements would be 3D printed and which would be created using other materials. Finally, groups created drafts of their pinball machine game boards and presented them to me for approval. This was an amazing opportunity to provide valuable feedback and ask probing questions about design elements so students could brainstorm solutions and make modifications to their design prior to the building stage.

STEP 3: Designing Game

Once the drafts were approved, groups could begin working on developing the 3D printed obstacles for their games. This allowed kiddos who were ready to move ahead the opportunity to push forward while I worked with teams who needed additional guidance.

Since my kiddos were familiar with Tinkercad, I continued to use this platform for designing their 3D printed obstacles. I created a new class and then shared the class code through Google Classroom. Even students who were new and had never had experience working on Tinkercad before, were able to quickly and easily create their own accounts.

I provided students with a series of modules to complete as a refresher since it has been almost a year since they had used the program. For kiddos who were new, this was a great opportunity to become familiar with the platform and practice creating their own 3D objects.

Once all groups had their drafts approved, it was time for groups to begin building their pinball machines. Pinbox 3000 provides an amazing video tutorial with step by step directions. Students were given their own pinball machine boxes and had to follow the tutorial as they built their machines.

Having done this the previous year, I highly recommended that students watch 3-4 minutes of the video then go back and watch it again as they built. This way they could see ahead to prevent any mistakes.

It took about an 1 ½ hours for groups to finish building their machines.   Have kiddos keep all of their scraps inside their boxes because they may decide to use those pieces later.

At this point, groups continued to design and print their 3D printed obstacles as well as their non-3D printed obstacles.

STEP 4: Putting It All Together

Once their obstacles were all created, it was time to decorate and put their games together. This was a really exciting time in class.

Kiddos loved using 3D pens to decorate the obstacles they created as well as paint their tabletops. The creativity, imagination, and ingenuity of my kiddos was absolutely astounding. I was awestruck by some of their creations.

Take a look at some of their final products:

STEP 5: Finishing Touches

When the pinball machines were done, students had to type the story and rules to their pinball machines. We put these in their own display stands so they were easy to read.

Teams also had to design and decorate their own voting boxes based on the theme of the pinball machines.

STEP 6: Pinball Night

Each year my school hosts an annual science/engineering night for families and students. This was the perfect event for my kiddos to showcase their 3D printed pinball machines. As visitors arrived to my classroom, they were given three tickets to vote for their top three favorite pinball machines.   Guests played their tickets inside the voting boxes located next to the pinball machines and played to their hearts content!

My room had a line out the door as families and friends waited to have their chance to play these tabletop pinball machines!

The next day groups counted their tickets and had their own party where they got to play and enjoy all of the pinball machines! Finally at the end of class, the winners were announced. It was such a special day!

Final Thoughts

I know this unit may not work for every classroom but you can definitely adapt it to meet the needs of your class.

Maybe you don’t have a 3D printer….no problem! Build the pinball machines without them and use cardboard and other materials for the obstacles.

Maybe time is a huge factor and you cannot commit hours each week to building pinball machines. Maybe you could integrate this project into your language and science curriculum. This unit is definitely cross-curricular and can be completed in small segments over a long period of time.

Another possibility is to purchase one of the predesigned games available on Pinbox3000. Students would still get the experience of building their own pinball machines but wouldn’t have to spend time developing their own stories.

I hope you find this project as exciting and beneficial for your students as I did for mine. This was the perfect culminating activity that not only challenging my students but also gave them the

Why Everyone Should Be Playing Board Games

If you aren’t playing board games (home or school), then you are missing out!  I can already hear your eyes rolling as you say something like, “I used to play Monopoly every Thanksgiving with the family, and if I am remembering correctly it was pretty boring.  Why would I want to play board games now?” That’s more than fair, but hear me out. Games have come a long way since 1935.     

Family time helps make lasting connections. 

Let’s start with the obvious reason board games are great for a family activity: it gets everyone around a table having fun. According to a study performed by John Hopkins University, students who have a positive relationship with their parents do better academically.  We know, as parents and educators, the positive effect of showing interest and simply spending time with a child can have.  Playing games and having fun will help to build memories and connections  

You get immediate feedback from other players. 

Personally, I love when you do something amazing and hear everyone at the table say, “ooh and ahh.” Who doesn’t love to hear, “Job well done?”  All of us love to get an “atta boy “ or job well done from time to time. Playing games gives us an opportunity to give earned and sincere praise to our children. 

According to Dr. Dewar, praise helps children feel like they can keep trying after failure, and continue working on challenging tasks.

Gratifications in accomplishments lead to increases in self-esteem. 

Many games are challenging and often take time to become really good at them.  Providing a challenge for your kids to overcome, helps them to build self-esteem through achievement.   Self-esteem earned by doing something that was hard is lasting. 

Playing against other people provides a greater challenge than playing against a computer. 

I love video games. I started playing them on an Atari. Video games have a problem though:  they can get predictable and at points boring. Playing with other people can prove to be more challenging as other players have the ability to adapt, be spontaneous, be irrational, and at times unpredictable.   

Tangibility, it is satisfying to move pieces around.  

Game play helps tap into and builds that kinesthetic enjoyment.  In the world we live in where everything is going digital, there is something satisfying about physical interacting with a game.  This is something a screen simply cannot do.   

Learning from mistakes

This is a hard lesson in life.  Mistakes can be costly and hurt sometimes.

Games provide an opportunity for students to take risks and fail while the cost is  “inexpensive.” Board games allow kiddos to learn how their choices affect their results in a safe environment. 

To quote Micheal Jordan, “I’ve missed more than 9000 shots in my career. I’ve lost almost 300 games. Twenty-six times I’ve been trusted to take the game winning shot and missed. I’ve failed over and over and over again in my life.  And that is why I succeed.” 

Practice creating a plan to accomplish a goal, and adapting to changing conditions 

One of the greatest strengths of modern board games is the large decision space they provide players.  This forces players to come up with many creative and clever ways to solve whatever problem the game has thrown at them.  Often it takes a few rounds for a plan to come together and as a result this players must think about how their actions will affect them a few rounds down the road.    

But, as the famous philosopher Mike Tyson once said, “Every man has a plan, until he’s punched in the face,” and many of our plans will not withstand initial contact with our advisories.  Most modern games require you to adapt under pressure as your initial plan unravels. 

Long term planning, mental plasticity in the face of adversity, and the cause and effect relationship of one’s actions are lessons we all want our kids to learn.  

Strategic thinking and problem solving

As a teacher I have always held the philosophy that teaching children to think is as important, if not more important, than the content in the curriculum.  Years from now, I am pretty sure my former science students won’t remember how to calculate the specific heat of an element, but I know they will still be able to identify a problem and logically work toward a solution.    

Games provide ample opportunity to hone this skill.  Over and over in most modern games, players need to identify the problem standing in the way of their victory, evaluate the options available, and how they are going to execute it while having fun (not that finding the specific heat of an object isn’t fun!).  Furthermore, the difficulty of the challenge often increases as the game progresses, encouraging the child to learn and try new strategies.  

Cooperative game play builds compassion and teamwork.

Many modern board games are cooperative, allowing you to play together with, instead of against, your family and friends.  Playing games like this provides an opportunity to practice their social skills, promote patients, and explore how to interact with others.  Children will need to explain what they want to do, ask for help from other players, and most importantly learn how their choices affect how others react.  

  • Did they demand someone else’s help or ask nicely?  
  • Was their tone angry or kind?  
  • Did they wait patiently for their turn or rush and pressure the others? 

They get to see how their behavior affects their enjoyment as well as the enjoyment of others

Children also develop compassion as they learn to understand others’ struggles with the same problem.  Kids can see someone else not get the cards or rolls they need to succeed and feel empathy because they were just in that same situation.  Showing support and helping to make people feel better or seeing how the criticism they gave hurt someone’s feelings is a valuable lesson. Kids can develop these social skills within a safe environment because at the end of the day, it is just a game!  

Playing games provides of the benefits we look for when we teach literature.  

Children get the chance to live and learn vicariously through the experiences the game provides.  It allows kids to be the brave heroes risking everything to save the world from a pandemic, rush into a burning building to save the residents, or rescuing the king as a tiny mouse knight from an evil scorpion.  Children can learn the elements of an well-developed story and apply those skills both in and outside the classroom.

Ultimately when it comes to board games, just like family dinner, it is less about what is on the table and more about who shares it with you.  

Phase 2: 3D Printed Board Games

After my kiddos suggested that we purchase 3D printers for our classroom, I was honestly a little nervous. I thought the idea sounded cool, but I didn’t know the first thing about 3D printing. I knew: 

  1. I love to learn and am pretty competent with technology.
  2. I teach an amazing group of students that thrive when challenged.

Because of these factors, I knew that together we could make it work!  

Thus began Phase #1 of researching and buying two 3D printers, choosing a program to teach my students and I how to build 3D objects, and creating a unit plan where that allowed for differentiation, levels of complexity, and that was also engaging. You can read all about Phase #1 in my blog post HERE.

Phase #2

After my kiddos had a strong foundation, I knew they were ready to take what they learned to the next level by creating their own original designs. And what better way to do that than creating their own board games. Why board games? Well, there are several reasons:

  • My family loves board games (not monopoly but more modern games like Pandemic Legacy).
  • My students LOVE board games just as much as I do so I knew had would have buy-in.
  • Board games would allow kiddos to have a lot of choice (theme, characters, rules, etc).
  • Game pieces could easily be 3D printed.

The first step was for students to evaluate different board games and come up with several lists:

  • Essential elements needed by all board games.
  • Elements Liked
  • Elements Not Liked

Story and theme was determined to be the number one element needed by all board games. Skill vs. chance, mechanics, playability, ascetics, and cooperative vs. competitive we’re also listed.

Students spent weeks planning their board games with their teams. Along the way, I provided guidance as I conferenced with each group.

Teams had to complete a planning guide with their game’s story, rules, game pieces , and a first draft of what their game would look like. This is also the stage where kiddos had to determine which game pieces would be 3D printed.

Once the first draft and planning guide were reviewed by me, students divided responsibilities and began working.

One requirement was that all students in the group had to design at least four 3D printed game piece on Tinkercad. Some kiddos felt more confident with the technology but it was important that ALL student spent time with the software creating their own original designs.  

Other jobs and responsibilities were…

  1. Making the game board
  2. Creating the player’s guide
  3. Decorating the 3D printed game pieces with paint, 3D pens, or whatever else they wanted to use. 
  4. Designing and making the game board.  
  5. Creating all the other non-3D printed game pieces like cards, tokens, currency, etc.

I purchased blank game boards and game boxes because I wanted to make this experience as authentic and personal as possible.  

This process took my kiddos about a month meeting daily for 35 minutes.

Time management was definitely the most difficult part of this unit for students. It took them two or three times longer than anticipated to do just about everything.  

The 3D pieces they created though were absolutely amazing. I was so impressed but the originality, creativity, and ingenuity of their designs.

Once all the games were done, we invited my kiddos’ families to come in and test out the games. Players were asked to rate the ascetics, story, mechanics, and overall playability of the game.  

I only heard amazing feedback! Some games definitely played better than other and were more thought out, but everyone who played agreed that the effort and creativity of these games were off the charts!

I broke my scoring rubric into three sections. The first assessed the game development and process, while the second section looked at the game as a whole. I included the feedback given by families at the game board night as well as my own thoughts. The final part only evaluated the 3D printed game pieces groups created.

In the end, students walked away from this project with more experience making 3D printed objects, as well as practiced engaging in explanatory writing, working cooperatively, and creating a final published product!

After this unit, my students had all of the skills necessary for our last and final 3D printing unit: PINBALL MACHINES!