Phase 2: 3D Printed Board Games

After my kiddos suggested that we purchase 3D printers for our classroom, I was honestly a little nervous. I thought the idea sounded cool, but I didn’t know the first thing about 3D printing. I knew: 

  1. I love to learn and am pretty competent with technology.
  2. I teach an amazing group of students that thrive when challenged.

Because of these factors, I knew that together we could make it work!  

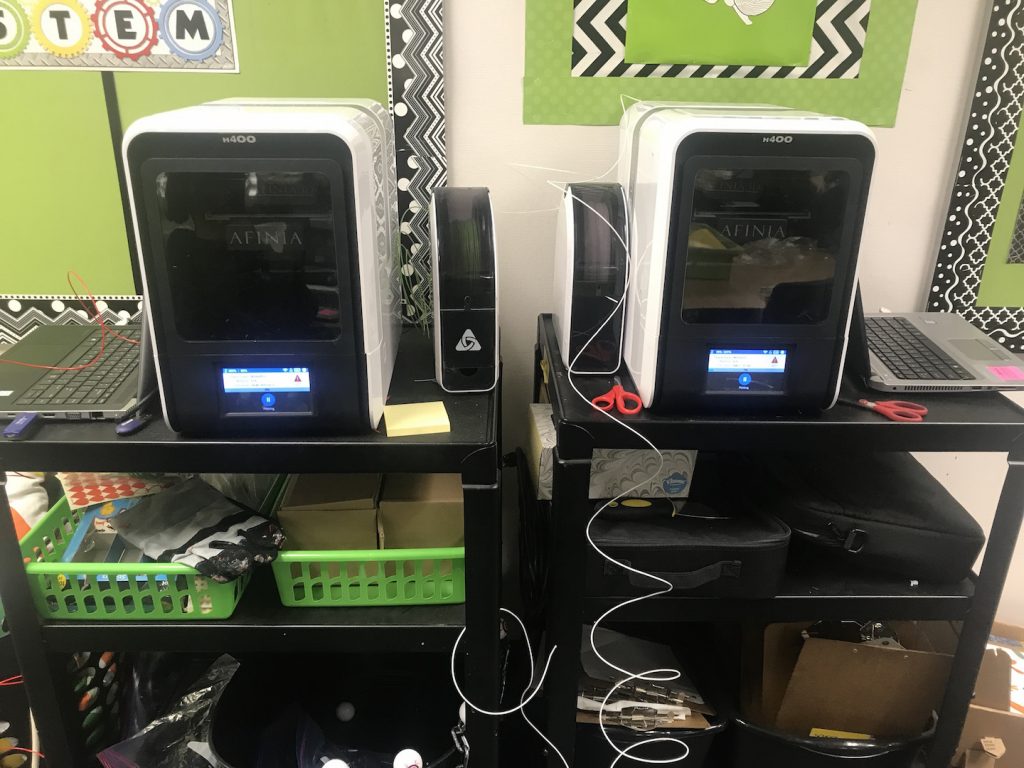
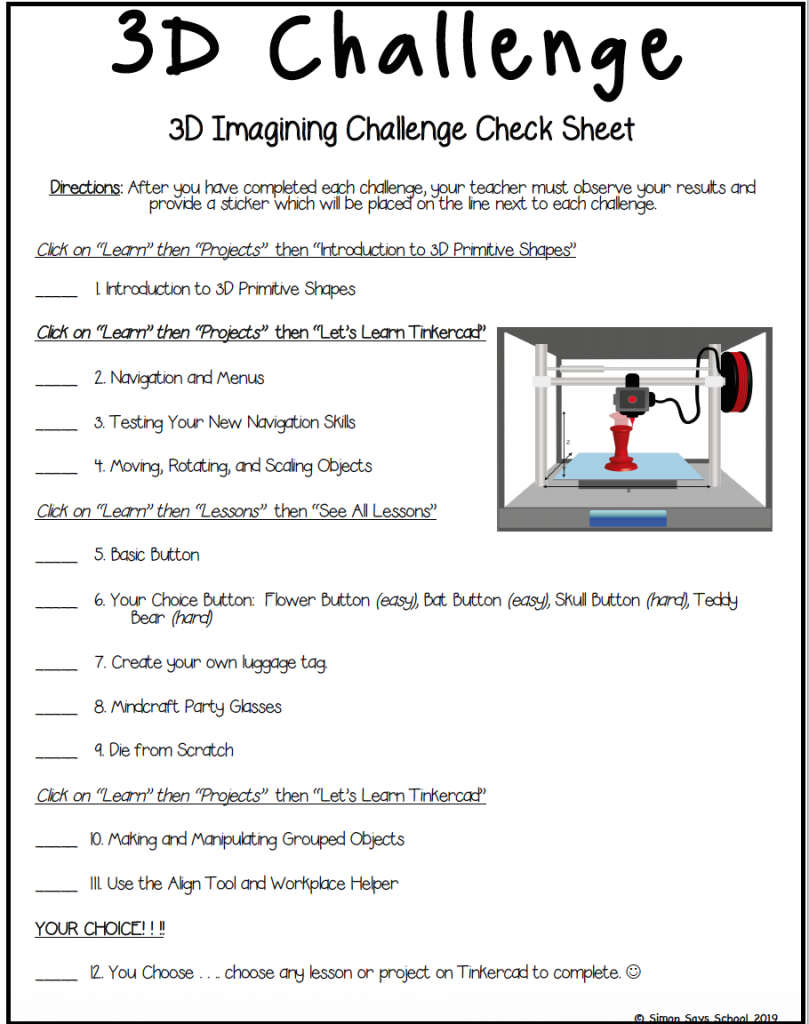
Thus began Phase #1 of researching and buying two 3D printers, choosing a program to teach my students and I how to build 3D objects, and creating a unit plan where that allowed for differentiation, levels of complexity, and that was also engaging. You can read all about Phase #1 in my blog post HERE.

Phase #2

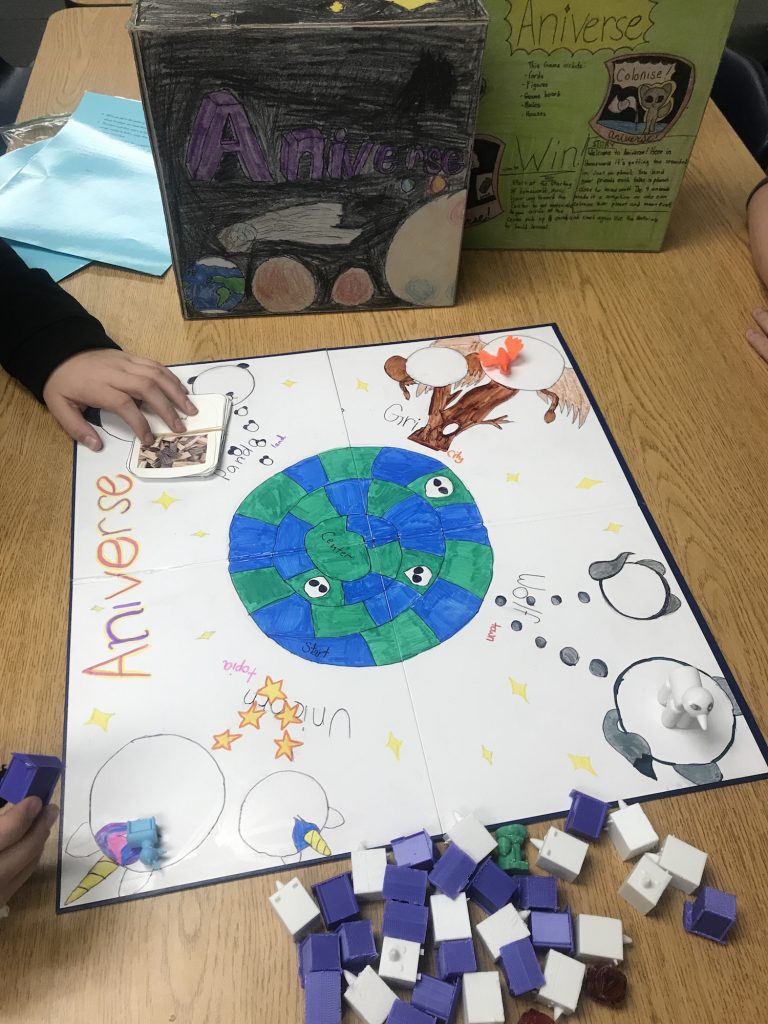
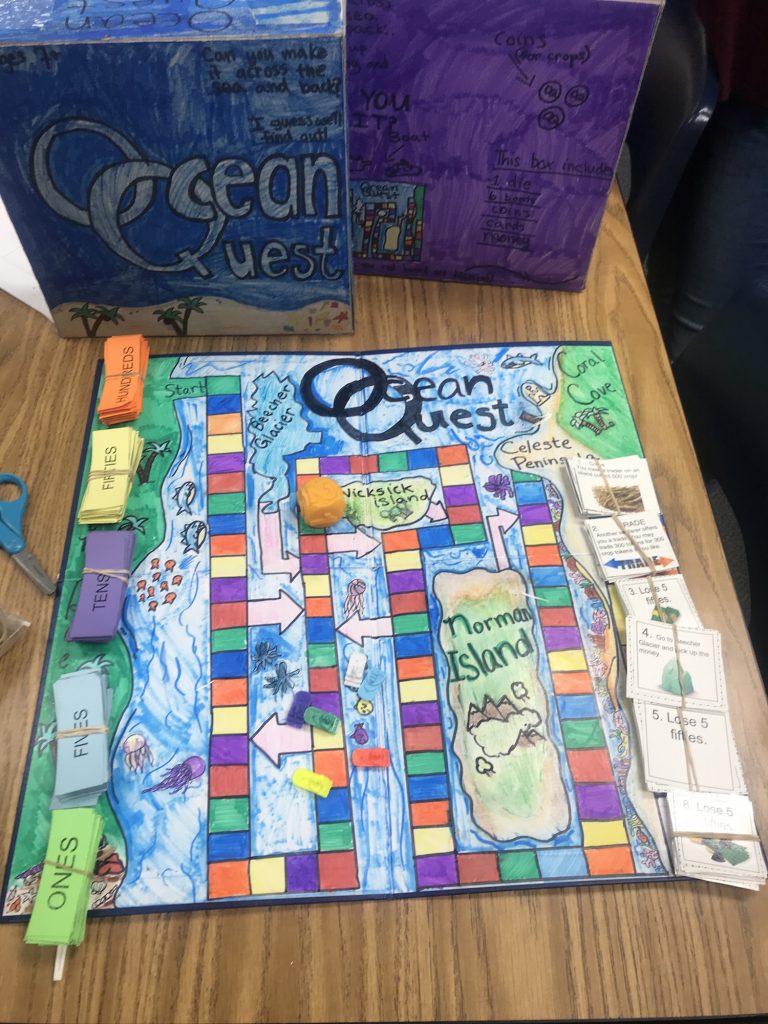
After my kiddos had a strong foundation, I knew they were ready to take what they learned to the next level by creating their own original designs. And what better way to do that than creating their own board games. Why board games? Well, there are several reasons:

  • My family loves board games (not monopoly but more modern games like Pandemic Legacy).
  • My students LOVE board games just as much as I do so I knew had would have buy-in.
  • Board games would allow kiddos to have a lot of choice (theme, characters, rules, etc).
  • Game pieces could easily be 3D printed.

The first step was for students to evaluate different board games and come up with several lists:

  • Essential elements needed by all board games.
  • Elements Liked
  • Elements Not Liked

Story and theme was determined to be the number one element needed by all board games. Skill vs. chance, mechanics, playability, ascetics, and cooperative vs. competitive we’re also listed.

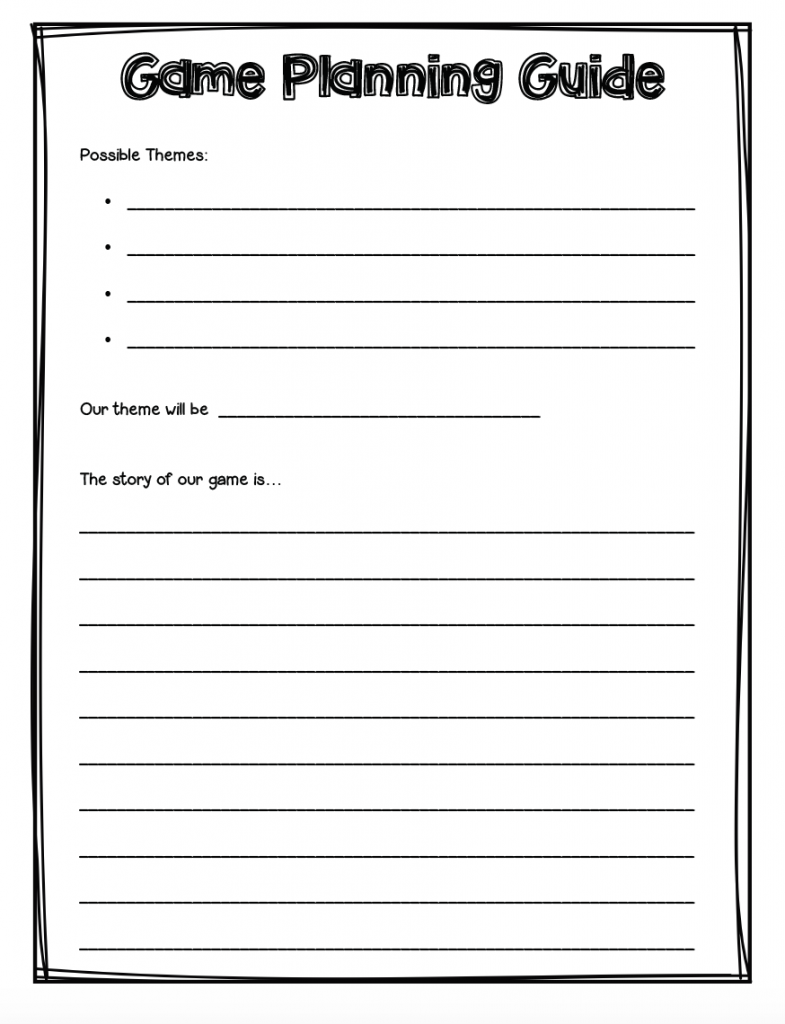
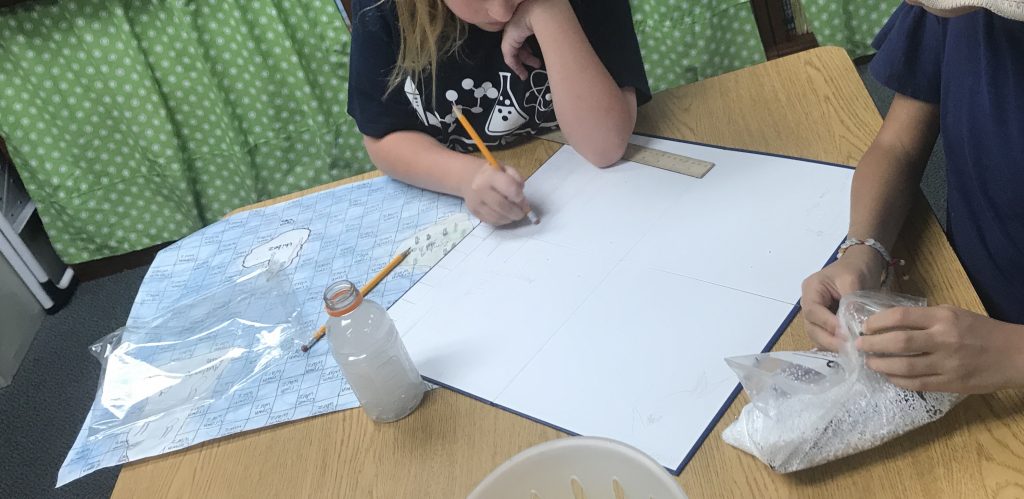
Students spent weeks planning their board games with their teams. Along the way, I provided guidance as I conferenced with each group.

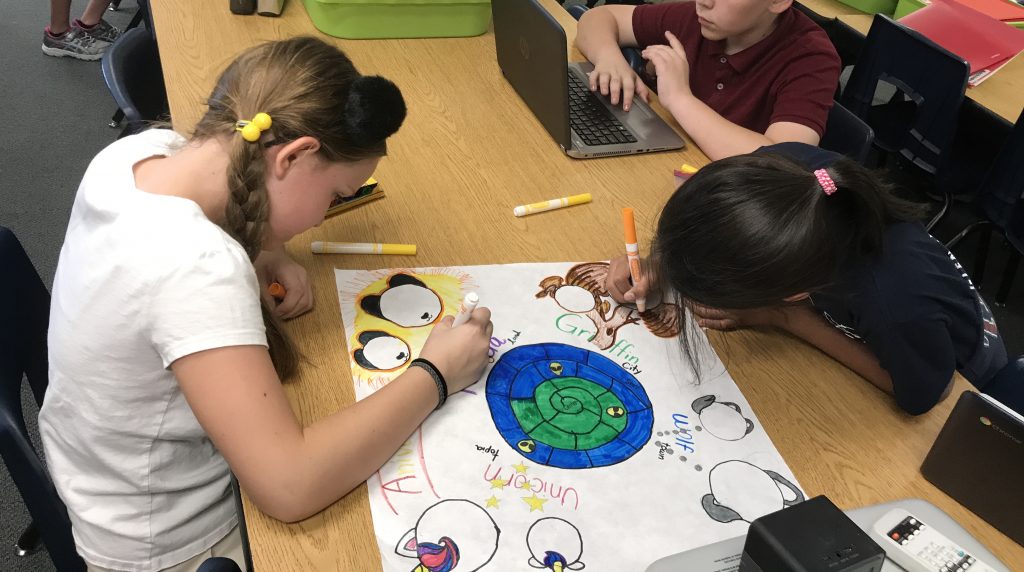
Teams had to complete a planning guide with their game’s story, rules, game pieces , and a first draft of what their game would look like. This is also the stage where kiddos had to determine which game pieces would be 3D printed.

Once the first draft and planning guide were reviewed by me, students divided responsibilities and began working.

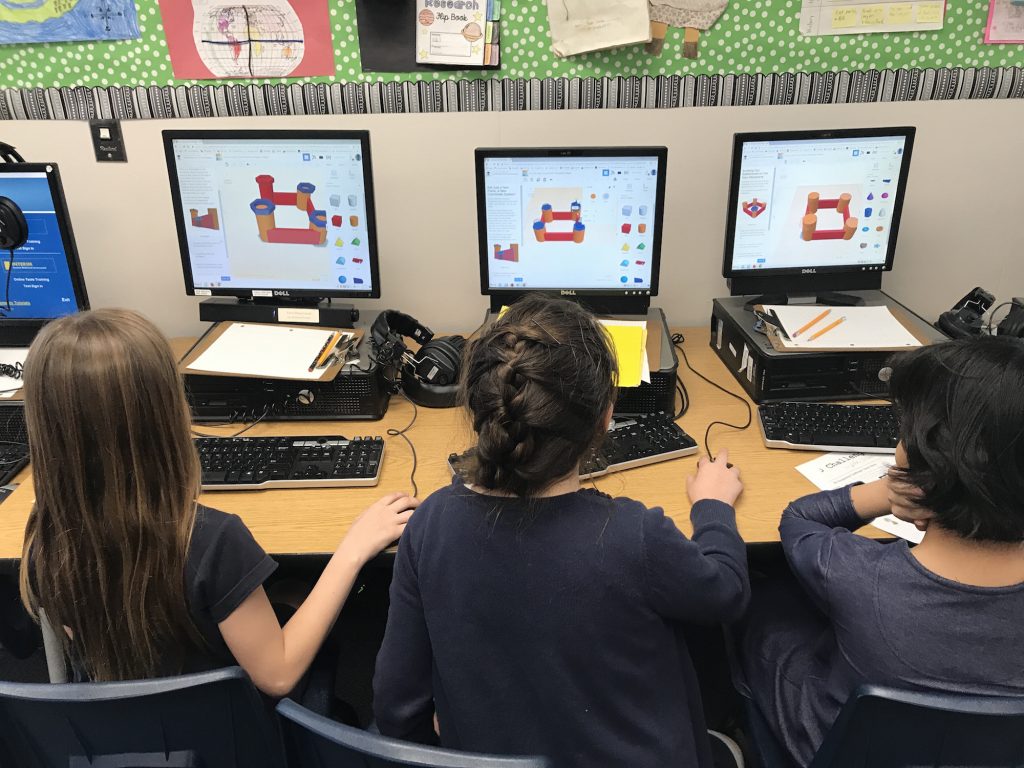
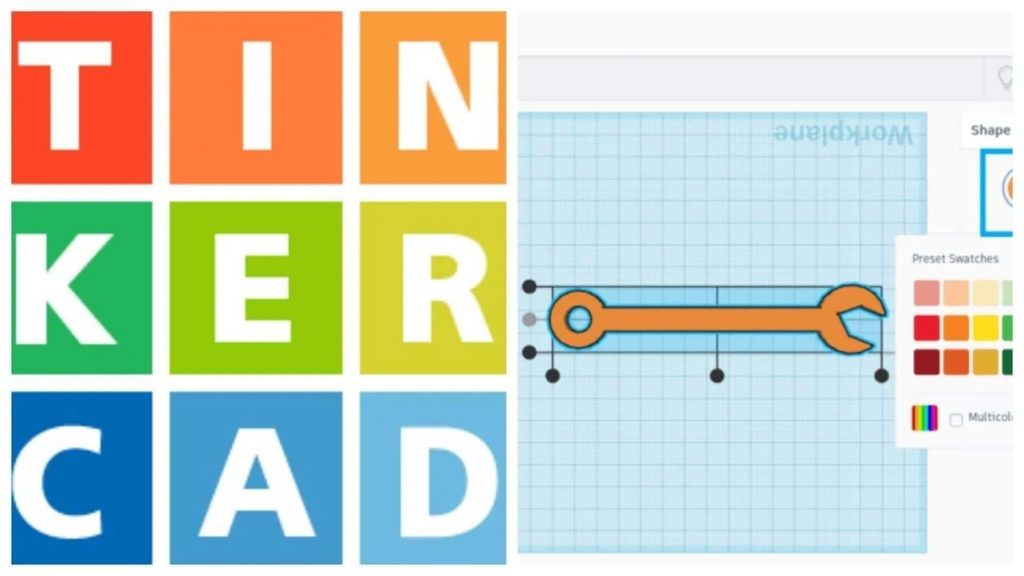
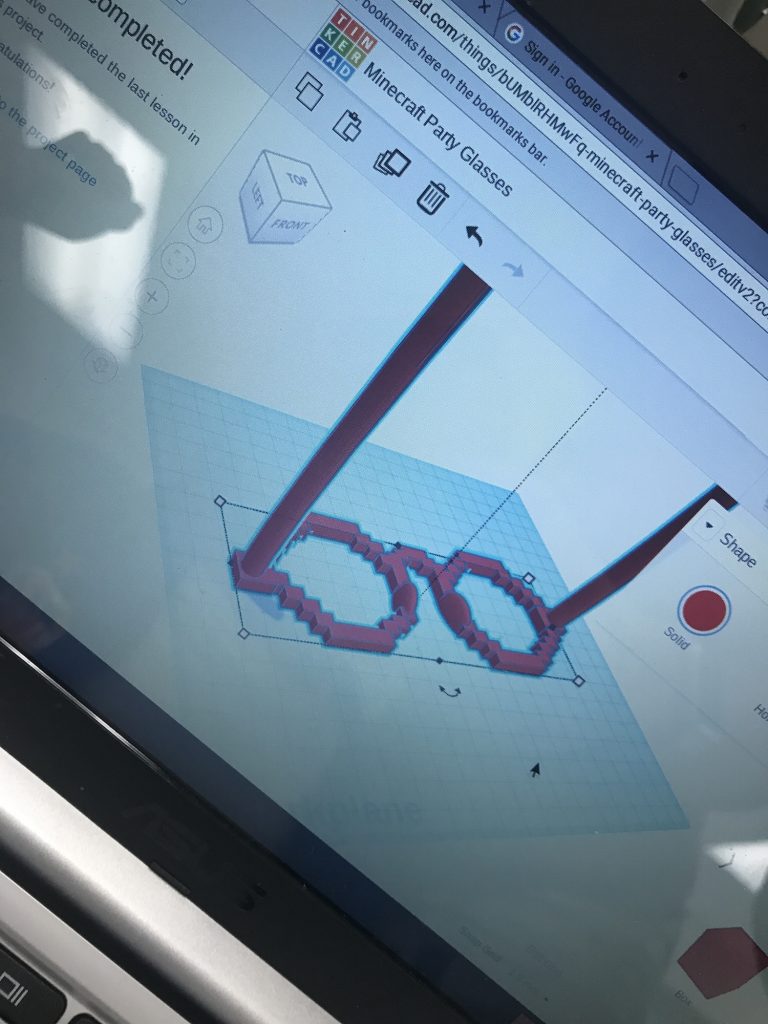
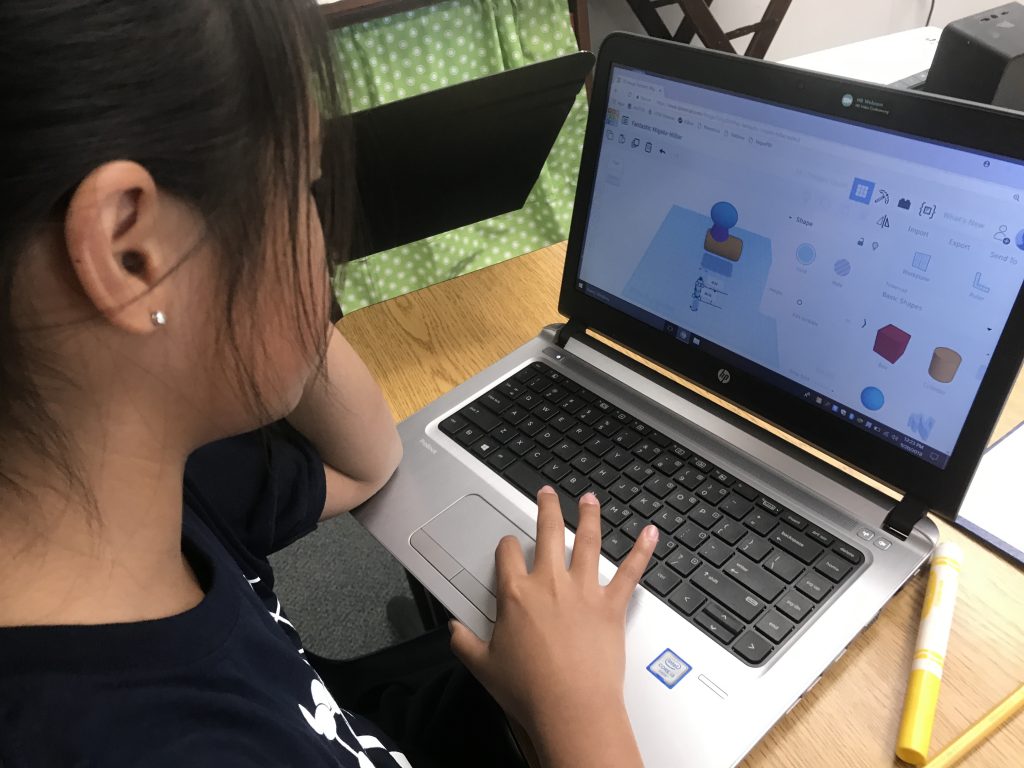
One requirement was that all students in the group had to design at least four 3D printed game piece on Tinkercad. Some kiddos felt more confident with the technology but it was important that ALL student spent time with the software creating their own original designs.  

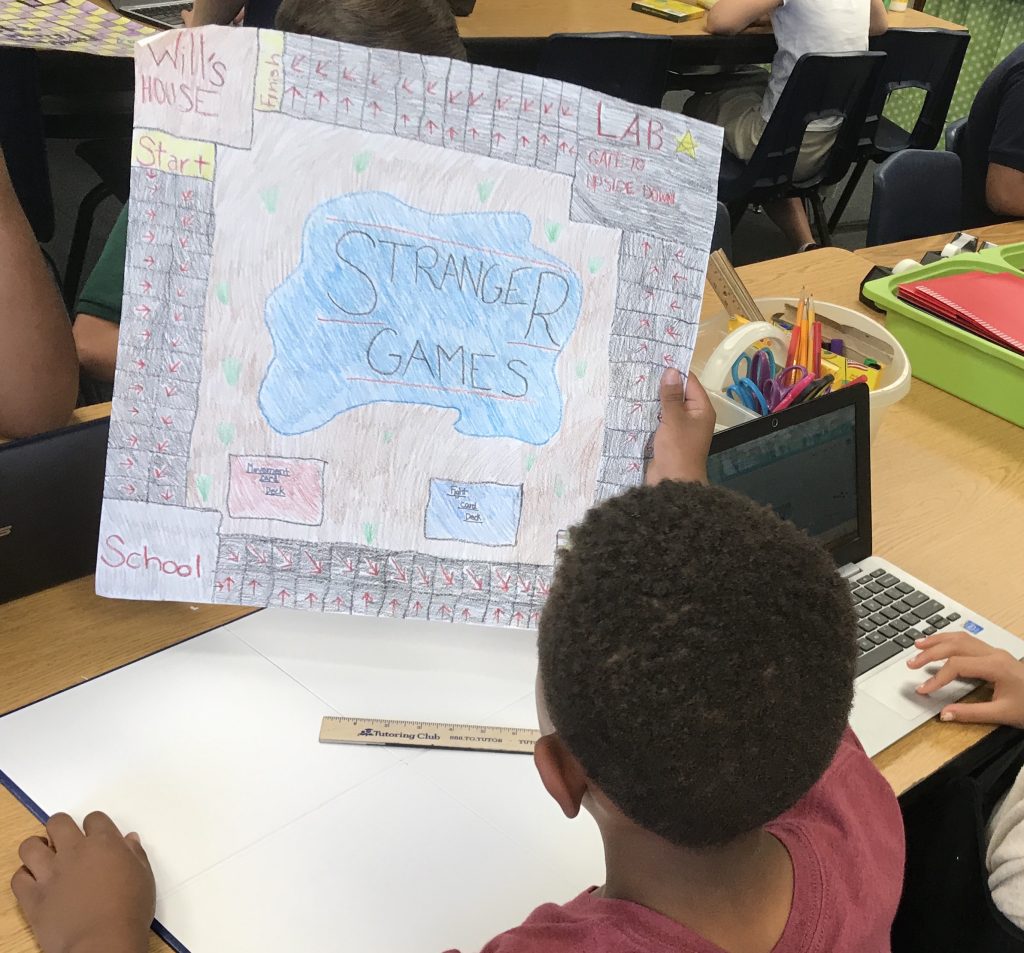
Other jobs and responsibilities were…

  1. Making the game board
  2. Creating the player’s guide
  3. Decorating the 3D printed game pieces with paint, 3D pens, or whatever else they wanted to use. 
  4. Designing and making the game board.  
  5. Creating all the other non-3D printed game pieces like cards, tokens, currency, etc.

I purchased blank game boards and game boxes because I wanted to make this experience as authentic and personal as possible.  

This process took my kiddos about a month meeting daily for 35 minutes.

Time management was definitely the most difficult part of this unit for students. It took them two or three times longer than anticipated to do just about everything.  

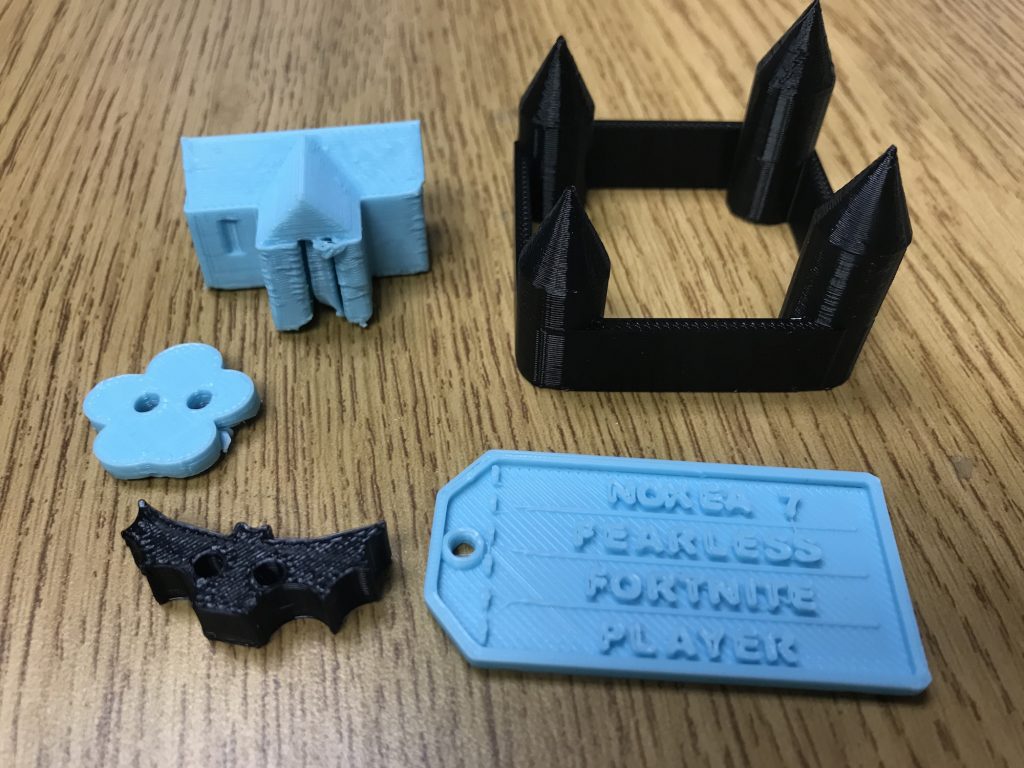
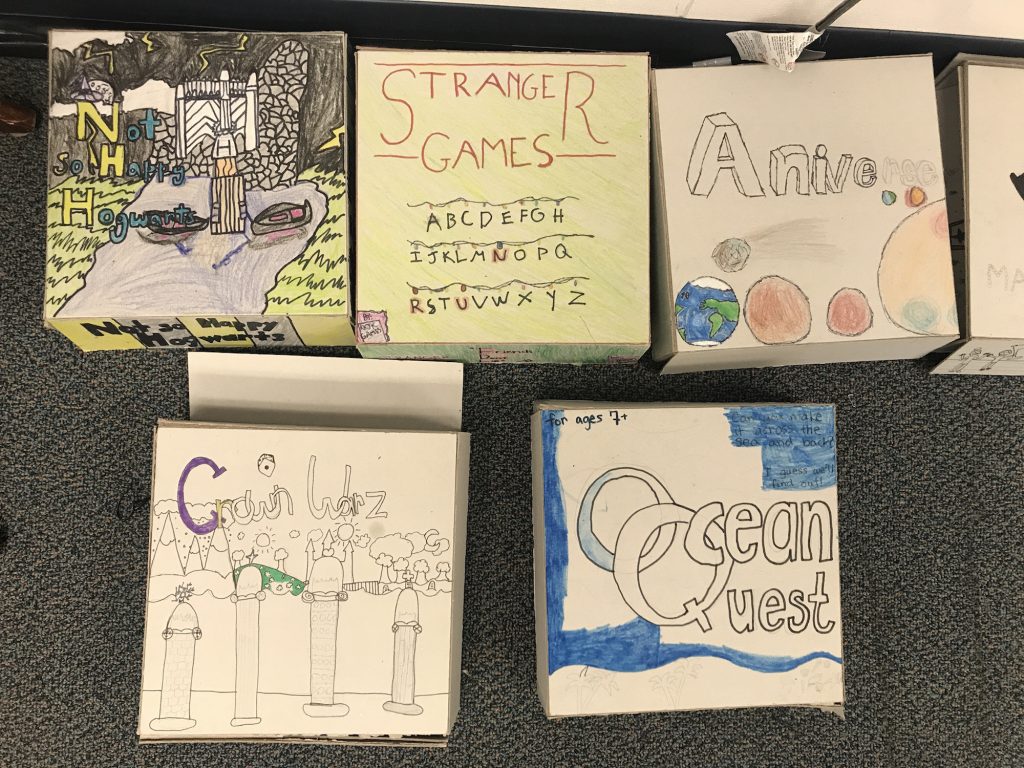
The 3D pieces they created though were absolutely amazing. I was so impressed but the originality, creativity, and ingenuity of their designs.

Once all the games were done, we invited my kiddos’ families to come in and test out the games. Players were asked to rate the ascetics, story, mechanics, and overall playability of the game.  

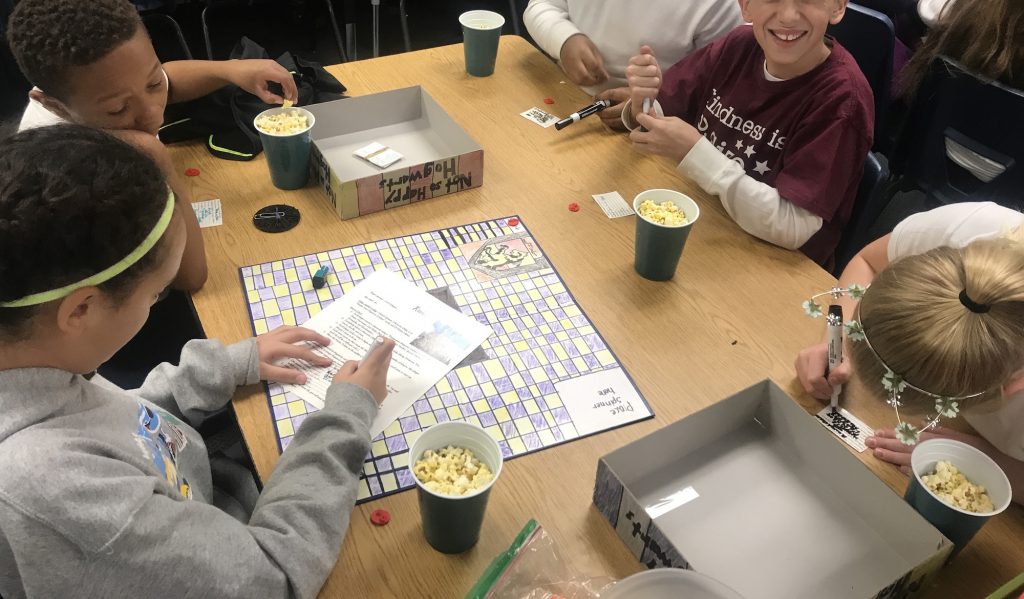
I only heard amazing feedback! Some games definitely played better than other and were more thought out, but everyone who played agreed that the effort and creativity of these games were off the charts!

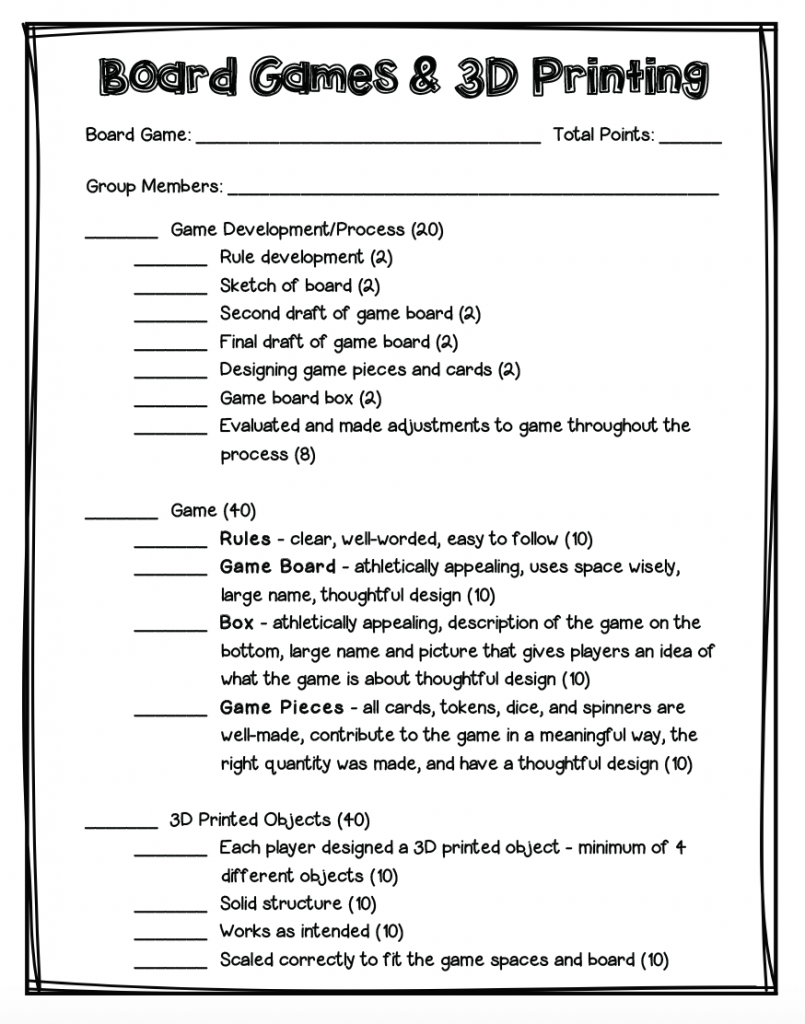
I broke my scoring rubric into three sections. The first assessed the game development and process, while the second section looked at the game as a whole. I included the feedback given by families at the game board night as well as my own thoughts. The final part only evaluated the 3D printed game pieces groups created.

In the end, students walked away from this project with more experience making 3D printed objects, as well as practiced engaging in explanatory writing, working cooperatively, and creating a final published product!

After this unit, my students had all of the skills necessary for our last and final 3D printing unit: PINBALL MACHINES!

3D Printing: Game Changer!

I am always looking for new ways to challenge and provide unique learning opportunities for my students.  I had some extra money left over from fundraisers I had held earlier in the year, so I asked my classes to brainstorm a list of items they felt would benefit our program.  In order to add an item to the list, students also had to create a plan of how the technology would be integrated. Items such as iPads, Lego EV3 robots, and 3D glasses made the list.  Ultimately, a student suggested 3D prints and after some research on my own (because I had no idea how they worked or even what they costs), our class purchased two 3D printers!  These printers have since become a stable in my gifted and talented curriculum ever since!

Why 3D printers?

3D imaging is an amazing tool to expose students to new learning opportunities while at the same time meeting their unique needs.  The concept of turning 2D drawings into 3D images will become tangible for students in a way that they would not get to experience otherwise.  In addition, kiddos will have the opportunity to use their imaginations and creativity in a way that will help prepare them for the 21st century!

Choosing a 3D Printer

3D printers range in price from a few hundred dollars to thousands.  After doing a lot of research, I decided to purchase the Afinia H400+ because cost effective, the printing area is enclosed (no burned fingers), it has a non-heated removable print bed and

allows multiple users to send print jobs from different devices to the same printer.  An added feature is that it accepts both MLA and APA filament, which is wonderful when you purchase whatever filament is on sale at the moment.  This unit costs only $599 and is shipped fully assembled!  Check out this quick overview video by Afinia:

Afinia is also a good choice because it provides lesson plans and a variety of challenging and complex curriculum packs for students to complete using the H400+ printer.  For example, students can learn about electric motors, gears, kinematics and basic principles of physics by building their own derby cars or they can participate in the engineering design cycle by making their own working flashlights.

Integration into the Curriculum

I ultimately created a curriculum that gradually gives more control and ownership to students. 

Here is the breakdown:

  • Phase 1 – During this phase, students will learn the history and current innovations of 3D printing and learn the 3D printing software.
  • Phase 2 – Working collaboratively in small groups, students create their own board games where all of the game pieces are 3D printed.
  • Phase 3 – In pairs, students construct their own tabletop pinball machines that include 3D printed obstacles that are designed exclusively by their own imaginations.

This article will explain the planning, logistics, and helpful strategies I have learned for Phase #1.  Giving students a solid foundation before moving on to more complex concepts/skills is so important!

Phase #1 – History & The Fundamentals

I always start out any new unit with a research study of the past, present, and future applications of whatever they are learning in class.  This includes bridge building, space, robotics, animation, 3D printing, and much more.  Students have the freedom to choose whatever modality they would like to share what they learned but it must include what technology is used, the history of its development, how it currently works, how the tech has changed over time, and where it is projected to go in the future.

The next step was choosing the platform I would use to teach students how to design objects using 3D printing software.  The Afinia software is ok, but I found that using a more user-friendly program like Tinkercad is perfect for students to learn how to design 3D printed objects, plus it is FREE.

After exploring Tinkercad, I identified a series of modules available that I felt would give students the essential skills necessary to someday create their own designs.  This included using the movement tools, adding shapes, grouping objects, making holes, etc.   Each module gives students step-by-step directions that are interactive, allows for students to back up if they make an error, and most importantly fun!

After entering my class list and inviting students to join, I gave each kiddo a checklist of modules to complete.  As students finished each item, I checked their work and gave them a sticker to place on their checklist.  You can find the checklist HERE.

Since I have classes of 25-35 students, I allow students to print four different objects that they created instead of all 15.  Obviously smaller objects are faster to print but the larger objects like castles can take up to two hours.  My goal is to always have everything printed from the day before for kiddos when they arrive to class the next day!

This is a good time to talk about filament.  A roll of filament lasts a long time.  I initially purchased 5 rolls of white filament and was still using them a year later.  You can find inexpensive filament on Amazon. As our projects became more complex, I purchased additional colors like lime green, sky blue, magenta, and powder pink.  But honestly, white is an amazing color because you can always paint it whatever color you want!

During this unit, students work at their own pace.  This allows kiddos who easily grasp the mechanics of each module to keep pushing themselves while those who require additional time have the opportunity.  Of course there has to be a point where you move on to a new study and this unit has to end.  For those kiddos who have completed all the modules early, I allow them to several other items they would like to design and print from the modules available or they can create an original object on their own.

I cannot tell you how much of an impact these 3D printers have made in my classroom.  My students and I went from not knowing a thing about 3D imaging to integrating it into at least one unit every single year they are in GATE. You can access my complete 3D printing unit HERE

This is just the first phase of my 3D printing unit!  Please check back to see Phase #2 where students work in groups integrate their own original 3D printed designs into self-created board games!

Let me know how you use 3D printers in your classroom by commenting below.