3D Printing: Game Changer!

I am always looking for new ways to challenge and provide unique learning opportunities for my students.  I had some extra money left over from fundraisers I had held earlier in the year, so I asked my classes to brainstorm a list of items they felt would benefit our program.  In order to add an item to the list, students also had to create a plan of how the technology would be integrated. Items such as iPads, Lego EV3 robots, and 3D glasses made the list.  Ultimately, a student suggested 3D prints and after some research on my own (because I had no idea how they worked or even what they costs), our class purchased two 3D printers!  These printers have since become a stable in my gifted and talented curriculum ever since!

Why 3D printers?

3D imaging is an amazing tool to expose students to new learning opportunities while at the same time meeting their unique needs.  The concept of turning 2D drawings into 3D images will become tangible for students in a way that they would not get to experience otherwise.  In addition, kiddos will have the opportunity to use their imaginations and creativity in a way that will help prepare them for the 21st century!

Choosing a 3D Printer

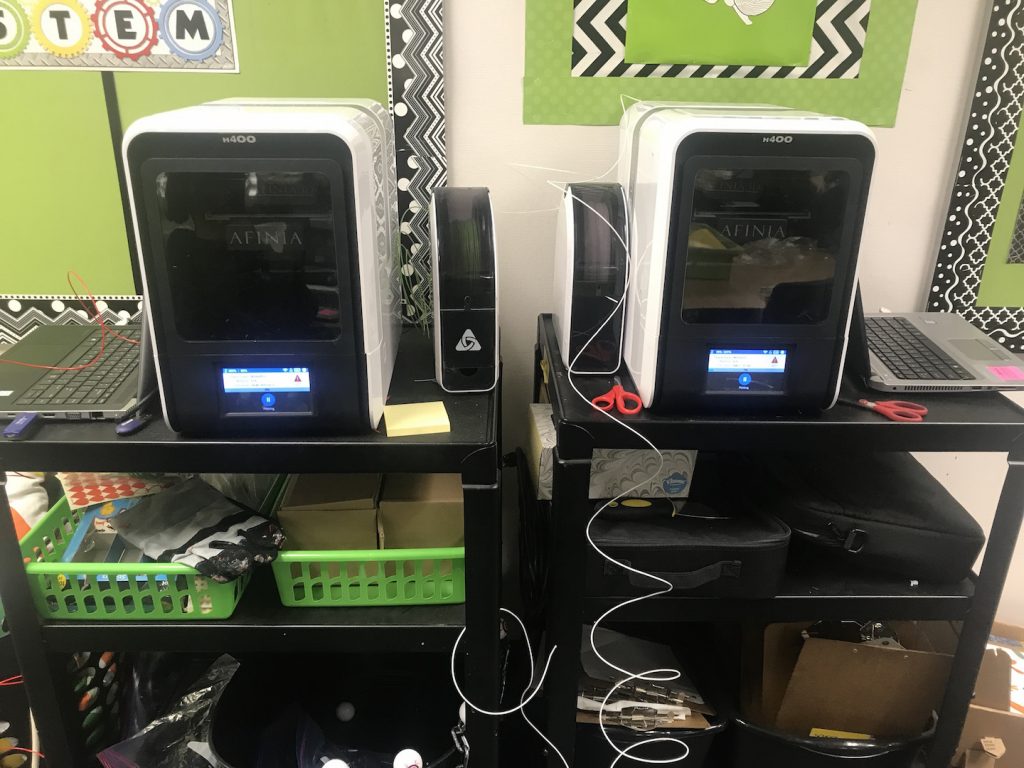
3D printers range in price from a few hundred dollars to thousands.  After doing a lot of research, I decided to purchase the Afinia H400+ because cost effective, the printing area is enclosed (no burned fingers), it has a non-heated removable print bed and

allows multiple users to send print jobs from different devices to the same printer.  An added feature is that it accepts both MLA and APA filament, which is wonderful when you purchase whatever filament is on sale at the moment.  This unit costs only $599 and is shipped fully assembled!  Check out this quick overview video by Afinia:

Afinia is also a good choice because it provides lesson plans and a variety of challenging and complex curriculum packs for students to complete using the H400+ printer.  For example, students can learn about electric motors, gears, kinematics and basic principles of physics by building their own derby cars or they can participate in the engineering design cycle by making their own working flashlights.

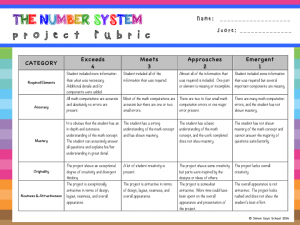
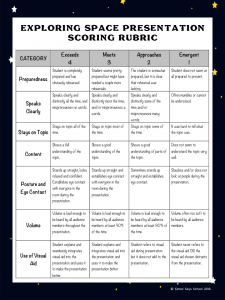
Integration into the Curriculum

I ultimately created a curriculum that gradually gives more control and ownership to students. 

Here is the breakdown:

  • Phase 1 – During this phase, students will learn the history and current innovations of 3D printing and learn the 3D printing software.
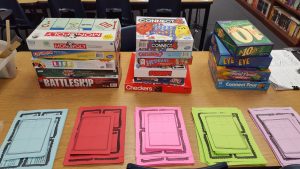
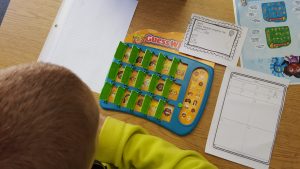
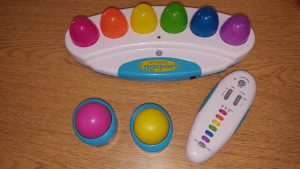
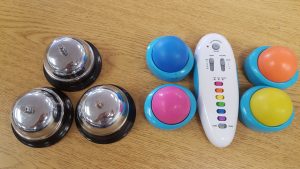
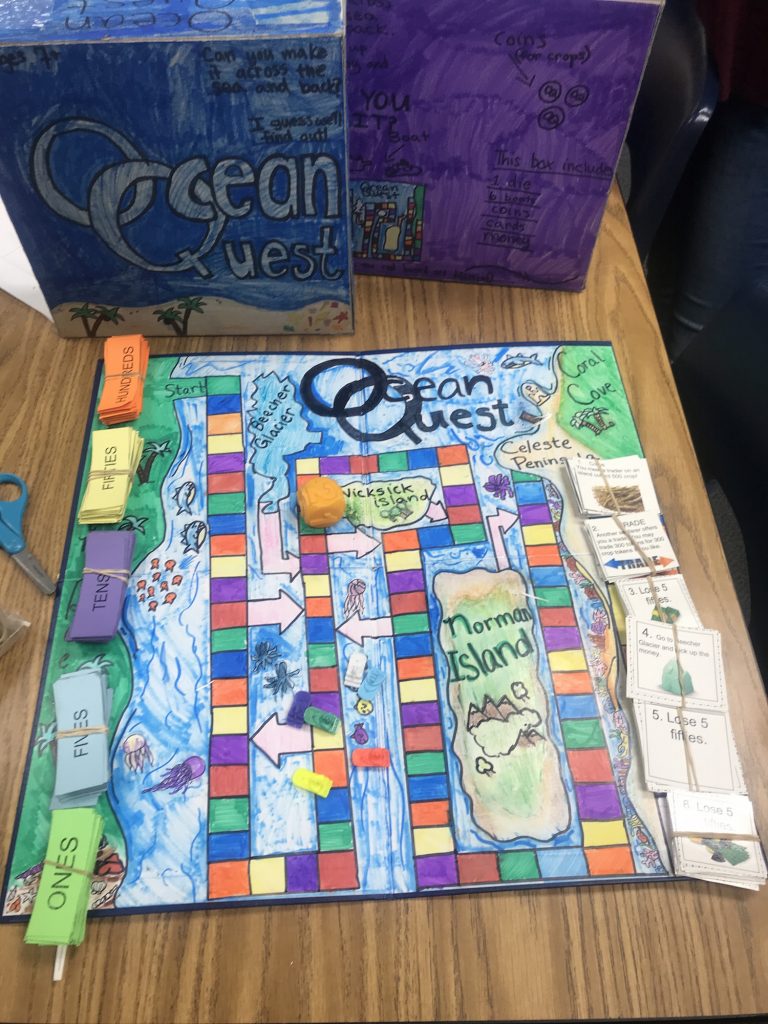
  • Phase 2 – Working collaboratively in small groups, students create their own board games where all of the game pieces are 3D printed.
  • Phase 3 – In pairs, students construct their own tabletop pinball machines that include 3D printed obstacles that are designed exclusively by their own imaginations.

This article will explain the planning, logistics, and helpful strategies I have learned for Phase #1.  Giving students a solid foundation before moving on to more complex concepts/skills is so important!

Phase #1 – History & The Fundamentals

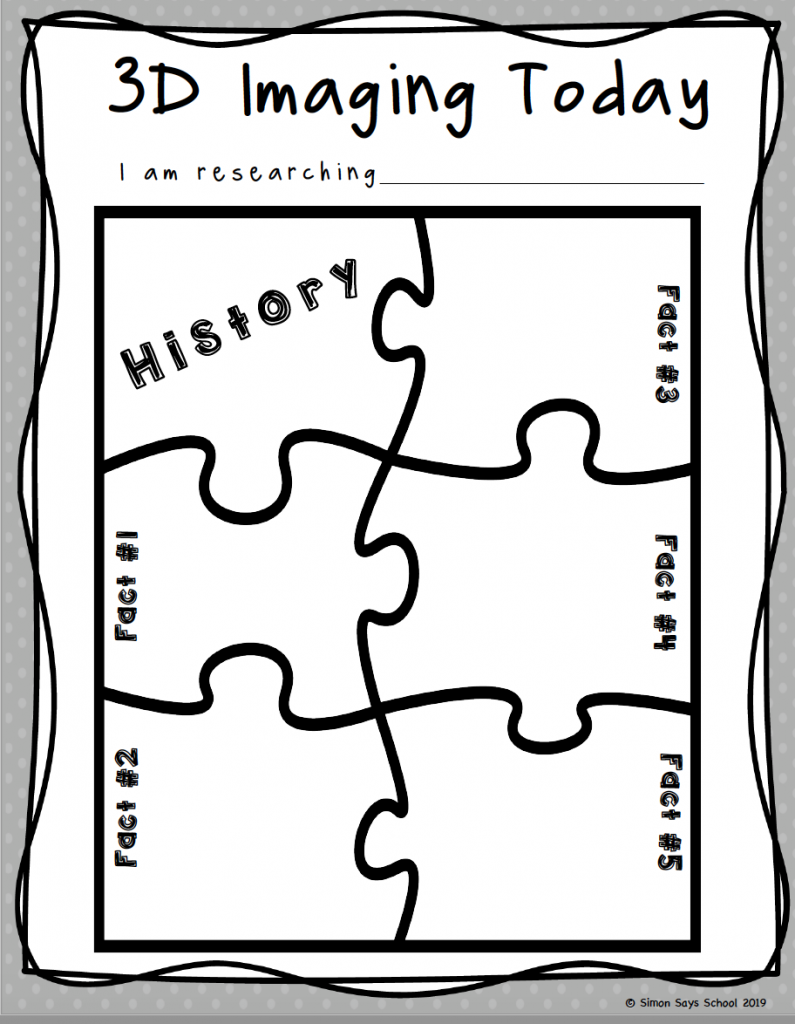
I always start out any new unit with a research study of the past, present, and future applications of whatever they are learning in class.  This includes bridge building, space, robotics, animation, 3D printing, and much more.  Students have the freedom to choose whatever modality they would like to share what they learned but it must include what technology is used, the history of its development, how it currently works, how the tech has changed over time, and where it is projected to go in the future.

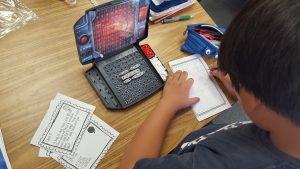
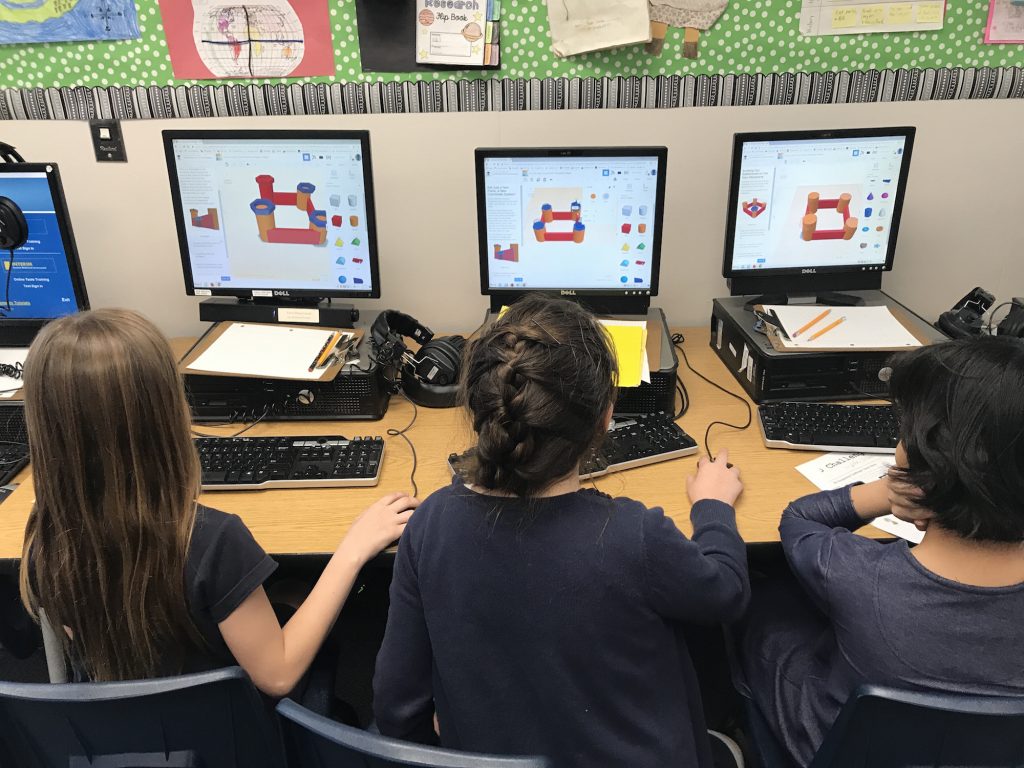
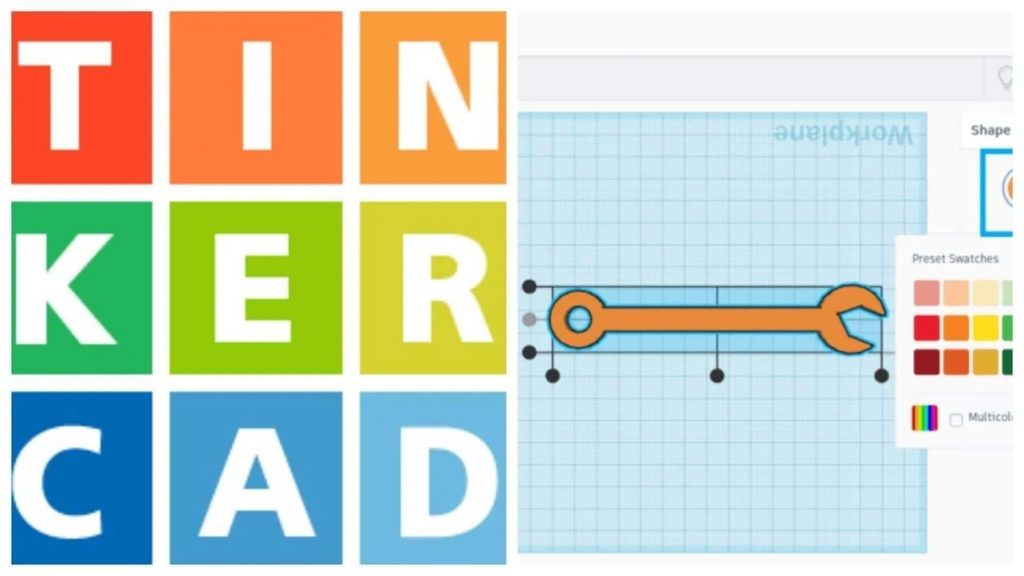
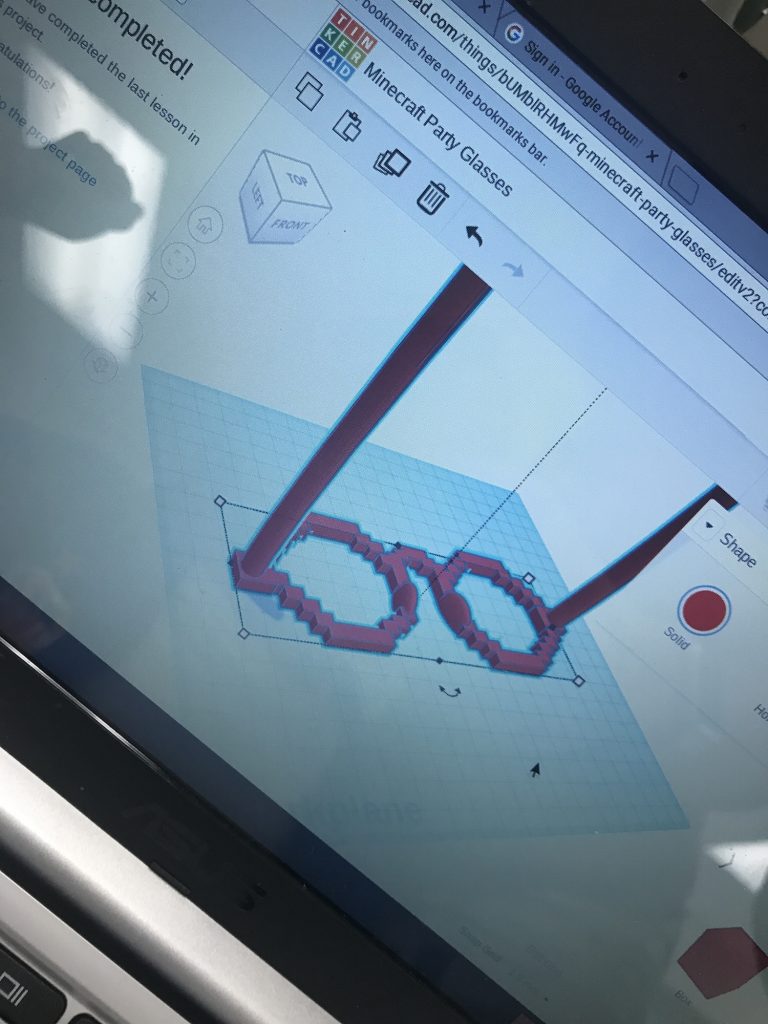
The next step was choosing the platform I would use to teach students how to design objects using 3D printing software.  The Afinia software is ok, but I found that using a more user-friendly program like Tinkercad is perfect for students to learn how to design 3D printed objects, plus it is FREE.

After exploring Tinkercad, I identified a series of modules available that I felt would give students the essential skills necessary to someday create their own designs.  This included using the movement tools, adding shapes, grouping objects, making holes, etc.   Each module gives students step-by-step directions that are interactive, allows for students to back up if they make an error, and most importantly fun!

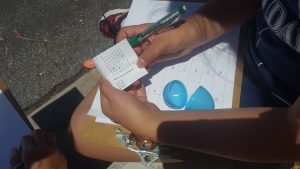
After entering my class list and inviting students to join, I gave each kiddo a checklist of modules to complete.  As students finished each item, I checked their work and gave them a sticker to place on their checklist.  You can find the checklist HERE.

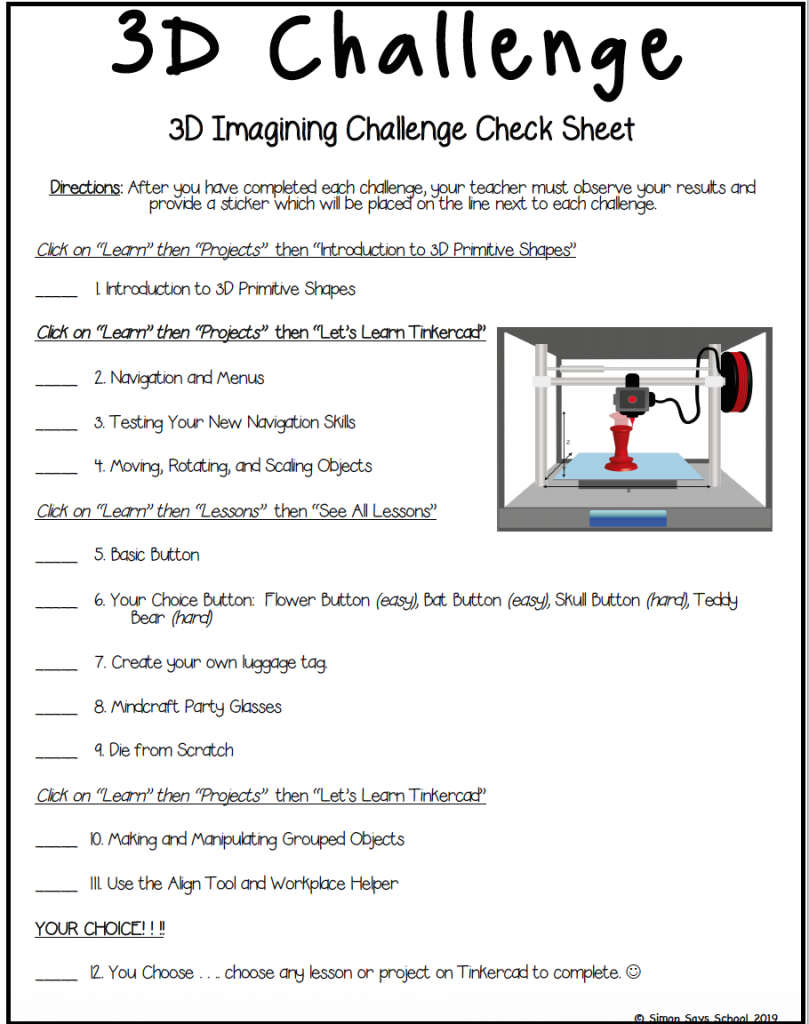
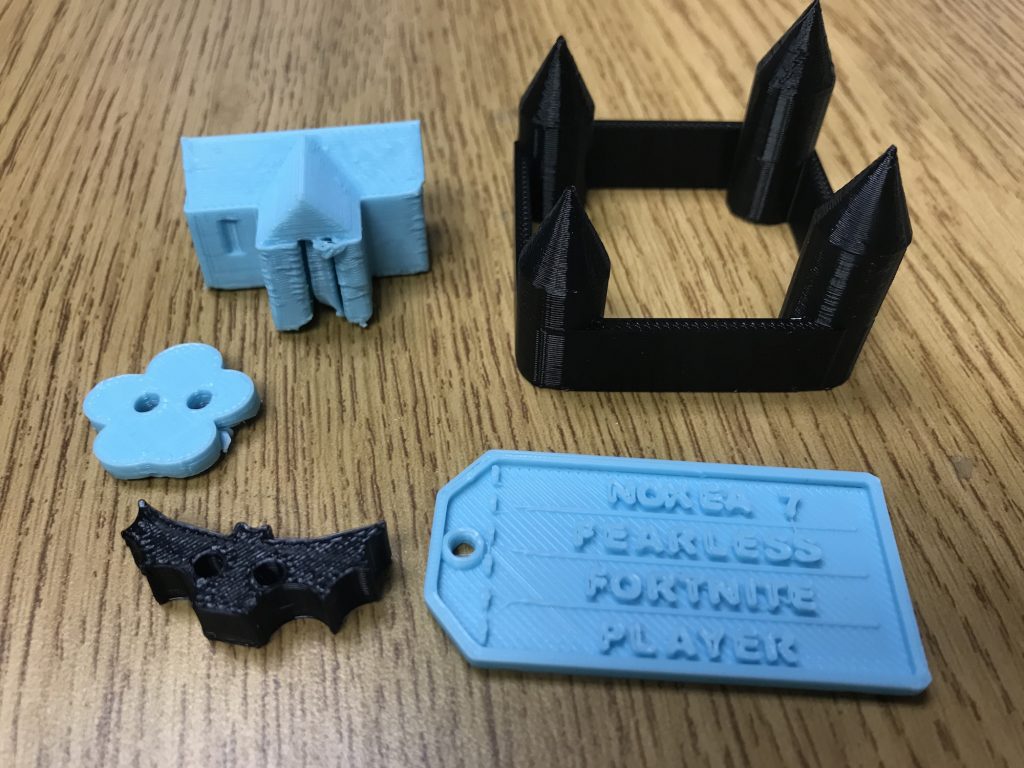
Since I have classes of 25-35 students, I allow students to print four different objects that they created instead of all 15.  Obviously smaller objects are faster to print but the larger objects like castles can take up to two hours.  My goal is to always have everything printed from the day before for kiddos when they arrive to class the next day!

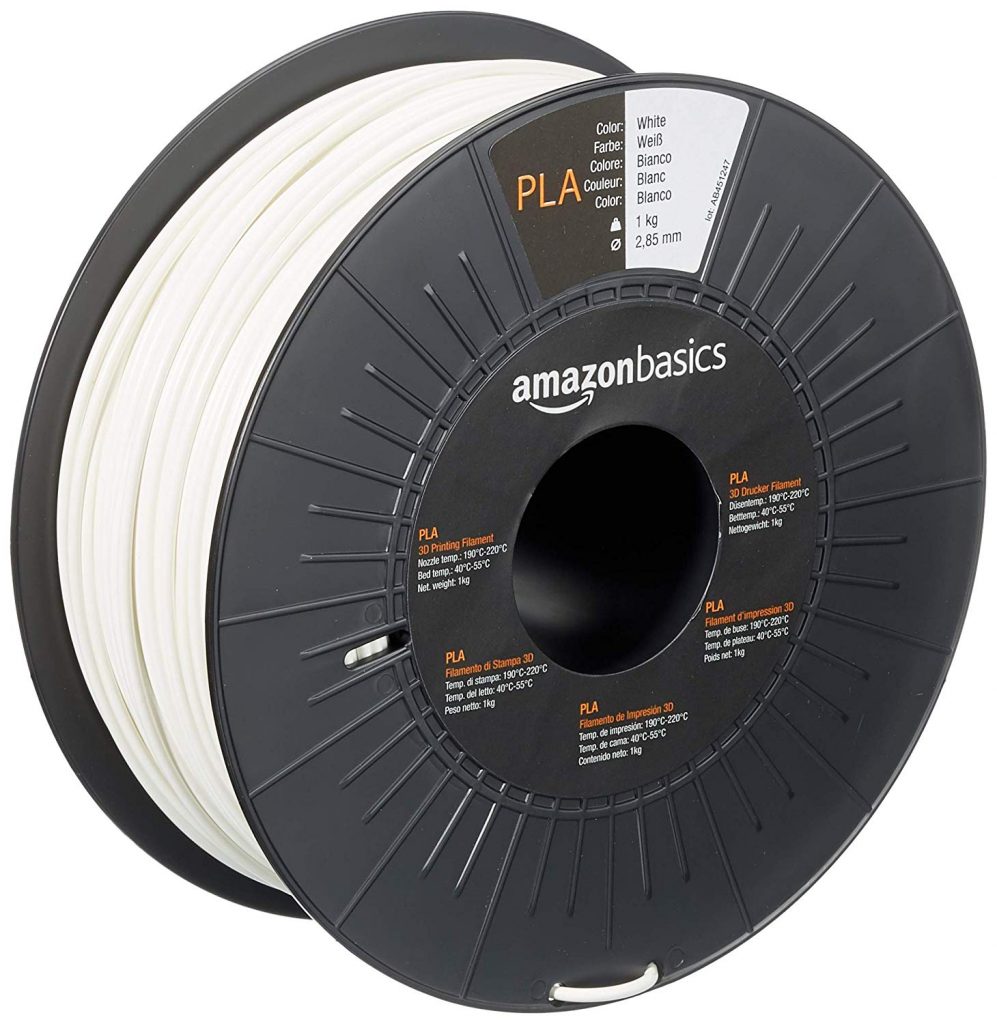
This is a good time to talk about filament.  A roll of filament lasts a long time.  I initially purchased 5 rolls of white filament and was still using them a year later.  You can find inexpensive filament on Amazon. As our projects became more complex, I purchased additional colors like lime green, sky blue, magenta, and powder pink.  But honestly, white is an amazing color because you can always paint it whatever color you want!

During this unit, students work at their own pace.  This allows kiddos who easily grasp the mechanics of each module to keep pushing themselves while those who require additional time have the opportunity.  Of course there has to be a point where you move on to a new study and this unit has to end.  For those kiddos who have completed all the modules early, I allow them to several other items they would like to design and print from the modules available or they can create an original object on their own.

I cannot tell you how much of an impact these 3D printers have made in my classroom.  My students and I went from not knowing a thing about 3D imaging to integrating it into at least one unit every single year they are in GATE. You can access my complete 3D printing unit HERE

This is just the first phase of my 3D printing unit!  Please check back to see Phase #2 where students work in groups integrate their own original 3D printed designs into self-created board games!

Let me know how you use 3D printers in your classroom by commenting below.

Digital Choice Boards: Game Changer!

I love choice boards!  They are an amazing differentiation tool to meet the needs of all of my learners while simultaneous providing choice and student ownership. 

Choice boards can be integrated across the curriculum.  Check out this Fraction Enrichment Choice Board I used in my own 5th grade classroom:

Each choice board is adaptable to meet the needs of your classroom and/or unit of study.  There might only be enough time for students to complete a couple of activities, so you may choose to have kiddos choose activities in a 3-in-a-row format.  Or you can assign a point value to each activity and learners have to complete a predetermined amount of points to receive full credit (i.e. choose activities total 10 points or more).  Other teachers might assign all of the activities to be completed.  It is completely up to you based on what works best for you and your students!

DIGITAL CHOICE BOARDS

Integrating technology has become an essential element in many classrooms and many classrooms are mandated to integrate more digital learning by their districts or states.  My district has adopted Google Classroom as the primary means to expose students to online learning.  In order to continue to provide differentiated learning opportunities for my students based on their readiness, interest, and learning profile, I created digital choice boards using Google Slides. 

The activities are completely paperless and involve using technology tools for students as they show their understanding of the topic of study.   

In the 6th grade activity below, students follow the hyperlink to an external website where they create their own digital fraction dice to complete the activity!

These boards also allow teachers to integrate activities that tap into each student’s multiple intelligences and learning styles.  Recordings, diagrams, typing, and a variety of digital creation tools allow students to fully maximize their learning potential and finally allow teachers to utilize the amazing technology made available by their districts!

If you are considering using digital learning menus in your classroom but are unsure if it is a good fit, here are five reasons why you should make the switch:

Reason #1

Each choice board can be modified based on your students’ interests and readiness.  Create text boxes for each activity option in your boards so that you can rearrange, swap out, or modify the activities so they are different every time. 

This will allow you to make changes for those students who need enrichment or for those who require IEP/504 accommodations by making quick changes to their assigned menus.  You can also provide additional technology tools or links that will help these students be successful in meeting their individualized goals! Here is an example activity from my EDITABLE 4th Grade Digital Interactive Beginning of the Year Math Choice Board that includes a description of the project, a link to the tools needed to complete the activity, as well as editable text boxes to make changes/adjustments as needed.

In this 5th Grade Math Digital Choice Board activity, students have a link to a specific website to find numbers with decimals as well as the tokens needed to identify the composite and prime numbers.

Reason #2

Providing feedback can be a challenge when students are working on their choice boards.  However, digital choice boards in Google Drive makes giving feedback so quick and easy.  As learners are working on their activities, you can check their progress from your own teacher computer and provide valuable feedback anywhere and at anytime.  You could be in a doctor’s office, at home on your couch, or even during one-on-one student conferences in the classroom:  it doesn’t matter.  You can access their work whenever it is convenient for you!   Check out this scoring rubric from my 6th Grade Beginning of the Year Digital Choice Board.

Reason #3

Of course, digital choice boards allow you to use LESS PAPER!  This is not only eco-friendly, but the time you spend making copies can be used for the hundred of other items on your to-do-list.  In addition, you won’t have to worry about students losing their work, and learners will also have access to their choice boards at home if they have Internet access.  This will not only be beneficial for students but it will also help create a strong home/school connection as students easily share their choice board activities with their families.

Reason #4

Student work is in ONE place!  The boards that I created in Google Slides include the choice boards, graphic organizers for each activity option, as well as the scoring rubrics for both student self-assessment, as well as teacher-assessment.  Students are able to showcase their knowledge using a variety of different tools and resources that are intuitive to use and easy to insert into the slide.   This provides an easy way to keep kiddos accountable all in one place!

Here are examples of two interactive graphic organizers that have helped me easily monitor the progress of my kiddos:

Reason #5

Choice boards through Google Slides is a great way to choose the digital tools and resources students use to showcase their understanding of each standard/skill.  By creating hyperlinks to pre-selected websites and applications, kiddos can safely, quickly, and easily access the most appropriate resources for each activity!  Here is an example from my 5th Grade Digital Beginning of the Year Choice Board:

I LOVE LOVE LOVE choice boards!  Creating digital boards with interactive graphic organizers allows me to continue to meet the needs of all of my 21st century learners in a way that is easy, efficient, and beneficial for everyone.

Take a look at some of the EDITABLE digital beginning of the year review choice boards I have created and are available on my Teachers Pay Teachers store:

I hope you find these resources helpful and a great addition to your classroom!

Choice Boards – Key to Differentiation

Wouldn’t it be nice if the students who walked through our doors came prepared with all the content knowledge from previous years they were supposed to have? If this were the case, teaching would be a lot easier.

At times our job as teachers can feel extremely overwhelming, if not impossible. How in the world can we possibly be expected to teach 25 to 35 students at different levels and abilities?   I asked this same question to myself over and over again during my first years as a teacher. I had implemented a variety of differentiation strategies just like they taught me in my undergraduate program like leveled readers, centers, and literature circles. However, I still didn’t feel like it was doing enough.

I then started doing research and discovered the world of learning menus and choice boards. Choice boards are an amazing graphic organizer that enables students to choose how they will learn or show their understanding of a concept or topic.

Here is a list of 10 reasons why choice board are a great tool for any classroom.

  1. Effective and Easy

Choice boards are by the far the most effective and easy ways to differentiate that I have found. There are so many wonderful resources available to help teachers plan meaningful activities to learn and showcase their learning like HERE.

  1. All Content Areas

What other resource can you use to differentiate across all content areas?  I have integrated these boards for units on space exploration, the Oregon Trail, measurement, and even as an alternative to standard reading logs. No matter what you are teaching, you can create a choice board to match.

slide03

slide04

  1. Empowers Students

Choice boards are an amazing tool that empowers students through choice. Students are able to take ownership of their own learning because they had the opportunity and freedom to choose which activities to showcase their understanding of the content or topic being covered.   I always put in a “Your Choice” option for students. This way if they have the freedom and flexibility to create their own activity if none of the options appeal to them. Before students can begin on the activity they created, they must complete a project proposal graphic organizer to help them plan out their activity. Students then must present their proposal to me for approval. This way I can help them polish their idea or get them on the right track if they are completely off base.

slide04

slide05

  1. Highly Personalized

Based on the interest, learning preferences, and readiness of my students, I can create personalized menus that include activities at the DOK levels and learning styles that meet my students’ needs.   This is extremely powerful because I have the power to

slide03

  1. Instant Engagement

According to Morzano, one of the most effective ways to engage students is to give them choice. Students will find more meaning and will be more focused if they are given the flexibility and freedom to choose how they learn.    

  1. Content, Process, and Application

Choice boards can be integrated into the content, process, or application portion of any lesson. The content can be differentiated through accelerated, remediated, or enriched content

  1. Time Flexibility

Depending on the amount of time that is available, choice boards can be used for a single lesson, a whole unit, or even as a homework assignment. I loved using choice board as apart of my Weekly 5 reading centers (my way of adapting The Daily 5). There were choice boards for the writing, vocabulary, and word work centers.   For each center, student had one day to complete one of the activities on the menu. Other menus I have created, students have had an entire month to complete it like my Independent Choice Board Project I created to replace reading logs.

dirt-projects_page_01

  1. Set High Expectations

Students can help create the choice board and/or scoring rubric with their teachers so that they are active participants in their own learning and can set high but attainable expectations for themselves. This definitely helps students develop their metacognition, which is extremely important

  1. Many Types of Choice Boards

Teachers can choose from many different choice board formats like learning menus, tic tac toe, 2-5-8, baseball, and many more.   Click HERE to find dozens of examples.

  1. Scoring Rubrics

These menus can be evaluated using scoring rubrics that can be applied to every project imaginable.   I created my own activity and presentation rubrics for the and pretty much use them for everything. You can also give students more ownership by asking them to create the rubric together as a class.

slide08

slide14

There is no doubt that integrating choice board project into my classroom has been a huge game changer. All students, especially gifted and reluctant learners, have benefited because they have developed a greater sense of ownership, the ability to work at their own pace, and the freedom to choose or design activities based on their own interests and readiness.

Now that I am the gifted and talented resource teacher at my school, I collect choice boards across all grade levels and subject areas. This way if teachers come to me for help, I can pull out a surefire way to meet the needs of all the students in their classrooms that is both effective and easy to implement.

Signature

Spicing Up Test Review

During my first year of teaching, I was told by my grade level chair that the best way to prepare for a standardized test was to give A LOT of sample tests. I thought something seemed fishy (because it went against everything I learned in college) but since it was my first year teaching, I didn’t want to ruffle any features. I decided to go along for the ride and see what happened.

I remember staying hours after work one Friday in the copy room working along side my fellow teachers making 30 page packets per subject area (math, reading, and language/writing) for our students. It was grueling and didn’t leave feel me feeling excited for the next week.  This should have been a pretty clear sign that I needed to do something different because if I am not excited then there is no way my students will be either.

That next Monday, we began!  My poor kiddos took the first practice test without much complaint because that is how test prep had always been. While reviewing the test together, I decided that I wasn’t going to do this again. I was so bored and knew that my students felt the same way too. Now don’t get me wrong; I definitely believe that practice tests can be helpful in teaching test taking strategies and defining expectations for students. However, there is no way that three weeks of packets is a good idea.

Of course, I didn’t want to waste the packets I had created so I used them as the questions for the games and activities I created.   I walked into school the next day armed with an arsenal of fun and creative games and activities.  The response I got from my kiddos was amazing. Not only did they enjoy reviewing, they also scored higher than any other class at my school. I truly believe this is because the review we did was purposeful, engaging, and fun! Since this time, I have added new ideas to my suitcase of testing activities and hope they are just as helpful for you as they were for me!

BOARD GAMES

Introducing easy to play board games is a great way to make test review fun and engaging.    Before a student can make a move, he/she has to correct answer a question (task cards are the best).  I always have both students answer each question that way they both get the practice and can help each other if needed.

20160503_092307

20160503_133637

20160503_133625

WRITING THE TEST

Explain to students that they have been tasked with creating the standardized test this year.   Before they begin, I always give them guidelines and a list of the Common Core standards.  Here are the guidelines that I gave my kiddos this year for math:

You must remember to include…

  • A separate answer page that shows all work to complete each problem.
  • No more than 5 multiple choice questions or true/false
  • At least ten visuals (line plots, modeling for fractions, complex figures)
  • A minimum of 10 word problems.
  • The test must have a minimum of 35 questions.
  • At least seven questions must be asked per domain
    1. Operations and Algebraic Thinking
    2. Numbers and Operations in Base Ten
    3. Numbers and Operations – Fractions
    4. Measurement and Data
    5. Geometry

After students finished, they took each other’s tests and then met with the test writer if they found any errors.  I loved how my kiddos were able to help correct any misconceptions that either the writer or tester had.

TEAM GAMES

I love my Eggspert!   After dividing students into groups of four and giving each a marker board, marker, and eraser, teams have to work together to correctly answer the problem posed.  Before a team can push their egg (bells works great too), all members of their team must have the answer and support work on their board.  I then will randomly call on one student to explain how they got the answer.  This forces groups to really explaining their thinking to one another and help those who might need extra help!  If the group gets the correct answer then they earn 10 points, but if they get the wrong answer then all the other groups can steal for 5 points.  Of course you can play Jeopardy, Deal or No Deal, or any other game you want!

20160503_075216

20160503_075325

QUESTION CHAIN

Create a chain where each link is a different question.  Ask students each morning or at the beginning of the new class period to pull a link and everyone answers it as board work.  This is a creative way to create a countdown to the big test!

EGG HUNT

Don’t know what to do with your son’s or daughter’s Easter eggs?  Save them and use them for test review.  I place one question in each egg and then hide the eggs outside for students to find.  This is always a big hint.

20160502_131935

20160502_131817

SIDEWALK CHALK

Everything is better when you get to use sidewalk chalk.

20160503_075116


These are just a few ideas I have used in the past to make test prep fun, engaging, and more meaningful to students.  The bottom line is that test review doesn’t have to be boring or something to cringe at!   Have a great testing season!

Signature

Careers of Today Lapbooks

My first graders just finished their Careers of Today Lapbooks, and they look amazing.  Not only were the final products great, my students were able to apply all of the researching and reading comprehension skills they have been working on over the past 7 months.

20160404_104131 copy

20160404_104115 copy

Choosing a Career

To begin the project, I placed ten books about different careers in the middle of each table group.  I tried to include a variety of modern jobs for students to choose from.  I asked students to take a book from the middle and spend two minutes previewing it by looking at the pictures, reading the back cover and first page, and deciding if this was a career they would like to have someday.  I then rang a bell and students placed their books back in the middle and chose a new book.  We did this ten times.  The process took about 25 minutes but the time they spent reading, evaluating, and synthesizing was well worth it.

At this point, students had to choose one career that they would like to research.  Some students definitely had a hard time narrowing it down, but in the end, everyone chose just one!

Research

The next step was doing research.  Students were given graphic organizers that broke down the information they had to find into five categories: what do they do?, where do they work?, what tools or equipment do they need?, how do I become one?, and other interesting facts.

Laptops Picture

We had just read a book about park rangers together as a class and completed a similar organizer together on chart paper.  I really emphasize to the kids the importance of using bullet points and paraphrasing.  As an upper grades teacher, I know how important it is for kids to be able to take notes and not to plagiarize.   This is definitely a challenge with first graders but they have gotten so much better the more we have practice.

Students used the books they had previewed to complete their organizers. The category, how I become one?, was definitely the most challenging section for students to complete.  I asked that kiddos include 3-5 bullet points for each heading and most books didn’t go into great detail into the education and work that went into getting that job.

The Lapbook

After my kiddos had completed all of their research, we completed the cover of the organizer and each foldable one at a time.  Each foldable took about 20 minutes to complete.  I precut everything as much as I could beforehand and I also folded all of the lap books before passing them out to students. I took the project slow but allowed students who moved quickly the chance to keep going and begin working on the next foldable.

20160404_104020 copy

20160407_105404 copy

Presenting

As students finished their lapbooks, I had them pair up and use their lapbook as a tool to teach the other students about the career they researched.  I loved hearing them talk so knowledgeably and excitedly about their jobs.  Once they were finished presenting, I had them switch partners.  In the end, students presented at least four times and became mini experts of their chosen career!

20160408_103945

20160408_104003

If you are interested in doing this project in your own classroom, you can find this resource here.

Slide01

This resource includes all the foldables you will need with step by step instructions.

Slide19

Pictures of student samples are also included.

Slide18

I hope your students have as much fun doing this project as mine did.

Signature